How to Take Care of my Violin and Bow: a step by step maintenance mega guide
Now, whether you have just bought your new instrument or have been playing for a while, you want to preserve that investment of yours, that little object you love. Yes, I am talking about your fiddle. You know or guess that the more you give to your violin, the more it will give back to you. You both want to have an instrument that looks good and sounds good but also lasts as long as possible. That is why we need, as a violinist, to take maximum care of that fragile instrument: store it properly, clean it the correct way, service it or have it checked by a luthier. But we shouldn’t forget the bow as it is an important part of the instrument; some say the most important one.
This ultimate guide is the result of 40 years of violin playing and sharing tips with violinists on the road as well as teachers and luthiers.
Table of content
- Violin maintenance best practices
- What do I need to take care of my violin?
- What do I need to take care of my bow?
- How to store my violin?
- How to store my bow?
- When and how to clean your violin?
- When and how to clean your bow?
- What do I need to check regularly on my violin?
- What do I need to check regularly on my bow?
- When and how to change strings on your violin?
- When to change hair on your bow?
- Complete buying list for your violin a bow care.
Violin maintenance best practices
The overall attitude when it comes to maintaining a violin and its bows is awareness. An instrument needs to be inspected regularly. The musician has to be in symbiosis with its instrument. He or she shouldn’t be blind to its instrument glitches, problems, or just wear and tear that occur over time. We can compare our violin to a small child that we watch carefully and lovingly every day; we just don’t accept that something wrong occurs without fixing it immediately.
So there is maintenance that should be scheduled regularly with a professional, your violin maker of choice, or luthier. The frequency of that professional care of course depends on how much you play if you are a professional yourself, a good student, a beginner, or an amateur. I do not judge each musician per se, of course. But it is a question of common sense. You won’t want to spend a lot of money et call at your luthier every month if you pick up your violin every Sunday. But as a general rule of thumb, a good student should go to have his or her violin checked by a professional once a year, before exams. An amateur, every three to five years. A professional player, as often as required. The best makers often say they play the role of a psychologist for the player, perhaps a role more important than just fixing the instrument.
There are many things to watch for on such a complex instrument. I am going to detail them below.
What do I need to take care of my violin?
So you want to take great care of your violin. You need the following material, and not only to clean your instrument but for everything related to it, during your whole musical life.
To take care of your violin, you will need:
- Several micro-fiber cloths (at least two),
- Cotton pads and swab,
- Tweezers,
- Isopropic alcohol,
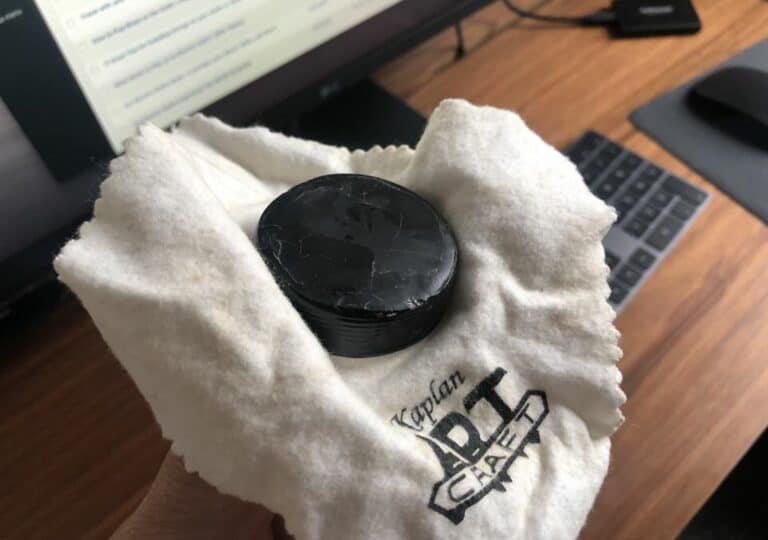
- Hill’s polish,
- Compressed air,
- Hard and medium paintbrushes,
- 2B pencil,
- String cleaner,
- Chinrest wrench
Everything you need is somehow related to cleaning your violin or changing your set of strings. But that’s ok. Everything harder than that should be performed by your luthier anyway.
You need at least two micro-fiber cloths and cotton pads because you do not want to contaminate the parts of the violin covered with rosin and the cleaner ones. Compressed air and brushes will help you remove dust from difficult places for example the pegbox and the cuts in the bridge. The 2B pencil will be useful to put graphite on the notches in the bridge and nut, where the strings are, in order to make them slide when you tune up your instrument. The alcohol should not be used on the varnish, that’s where Hill’s polish should be used for. Lastly, the chinrest wrench is used once or twice a year to remove the chinrest to get a perfectly clean instrument. Lastly, tweezers are of great help to insert the strings in the peg holes. They are important if you want to adjust the number of winding of the string around the peg. But more of that later.
I have detailed everything you need to do and know about violin maintenance in this blog post.
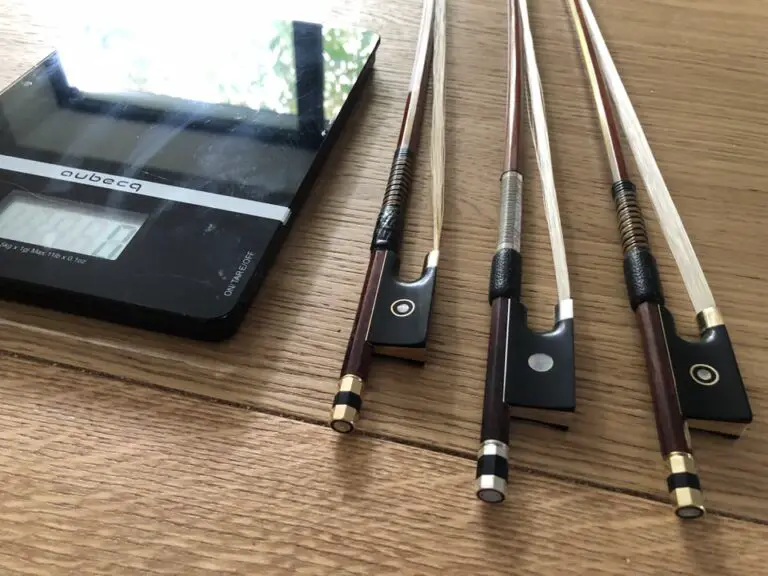
What to I need to take care of my bow?
To take care of your bow you won’t need many things that you don’t already own for your violin.
- Isopropic alcohol,
- Rosin,
- Cotton pads,
- At least two micro-fiber cloths,
- A small amount of grease,
- Rosin remover ? (While I don’t use such a product),
- A good bow case
Basically, you need to clean three different parts of the bow, for which you will have different tools.
The bottom of the stick, where it touches the hair. For that, you will need a separate cotton pad because you don’t want to take rosin powder from there and contaminate the whole bow.
The upper part of the stick can be cleaned with a separate clean cotton pad where you can put a tiny bit of Hill polish.
The frog that you can clean with some alcohol to remove dirt and sweat. And a tiny tiny bit of grease to put inside, on the screw.
I don’t use a product to remove rosin from the hear of the bow or the stick. On the hair, I just wipe out excess rosin powder and change hair often. For the stick, I do what my Master has always taught me: I spray a small cloud of alcohol on a cotton pad; with that, I clean the dust out of the stick without putting alcohol on the stick itself. I will explain that down below, on the “how to clean your bow” paragraph.
What do I need to check regularly on my violin?
Many things need to be checked on your instrument. We can separate what you can check and do yourself from what has to be performed by a professional.
1. What has to be checked by a professional
Your luthier will check:
- The presence of cracks in the wood,
- If your table starts to come loose,
- The position of the bridge on the table,
- The position of the sound post,
- If the fingerboard is flat,
- If the neck is straight,
These are things you can watch yourself, but it requires quite some craftmanship to judge them, let alone correct them. That is why your maker’s experience is invaluable here.

A small crack in the table of the violin is not a big problem in itself. They usually occur around the f-holes, where the wood is cut without being glued. That’s the role of the purfling, to prevent cracks to start. The problem is that, when there is a crack, it invariably will get bigger and bigger, as it will follow the fiber of the wood. And when it’s long, then it becomes problematic, not only for the sound but also the mere structure of the instrument. To vibrate fully, the table needs to be in one piece without any cracks, a bit like a bell doesn’t sound at all when cracked. If your maker sees a crack, he or she will immediately propose to fix it with some glue and a tiny piece of wood underneath the table to join the parts. Everything will be strong and sturdy again, and the sound will be as good as before, especially if the crack is small.
The table or the back come loose from the ribs, sometimes. Violins are glued, but not with the kind of strong glues that exist nowadays. The glue used is natural, its recipe is quite old, and it serves the purpose of giving the ability to reopen the instrument at will. As a technical feat, a violin is designed to work long years with maintenance in mind. How could you open and reopen a small box made of light and fragile wood if it was glued with strong modern glue? I have explained how a violin is glued in this post. The glue used is reversible. It accommodates for differences in temperature and humidity. It withstands vibrations without hindering them. It can be dissolved by alcohol or melted by heat. By doing so, the violin can be taken apart, and every piece can be repaired or changed. But sometimes, along the years, if we add up the time, the vibrations, the differences of temperature and humidity, parts become unglued and loose. It happens particularly when the violinist travels around the world, in humid countries, and takes a plane. The instrument doesn’t have the time to accommodate slowly from one to another environment. When the table and the ribs come loose, the sound becomes fuzzy. You can hear unwanted vibrations. You lose projection, power, and tonal qualities. At first, it is difficult to spot a violin that starts to lose its glue. But you will start to hear the difference from day one, for sure. Why not fix that as soon as possible? It is not serious and it is quickly repaired.
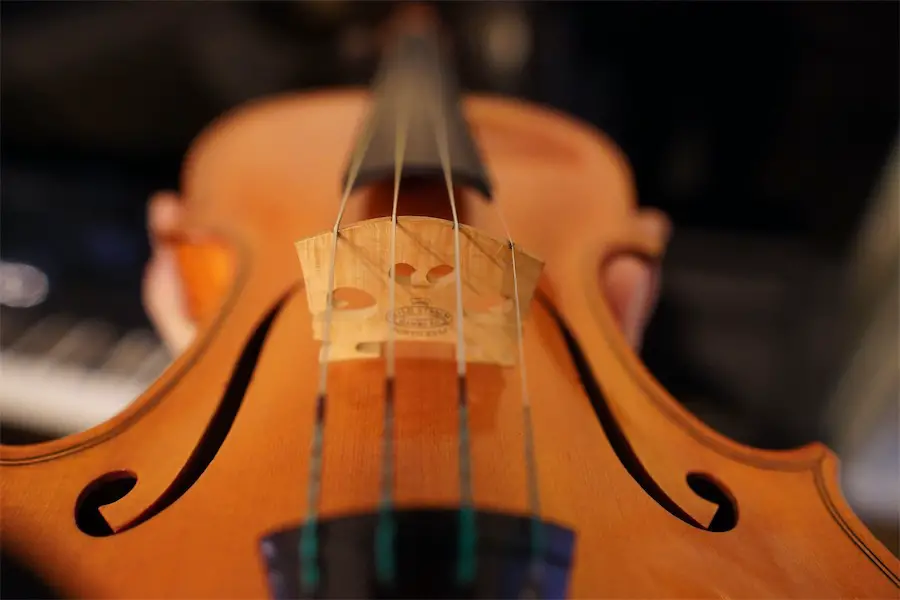
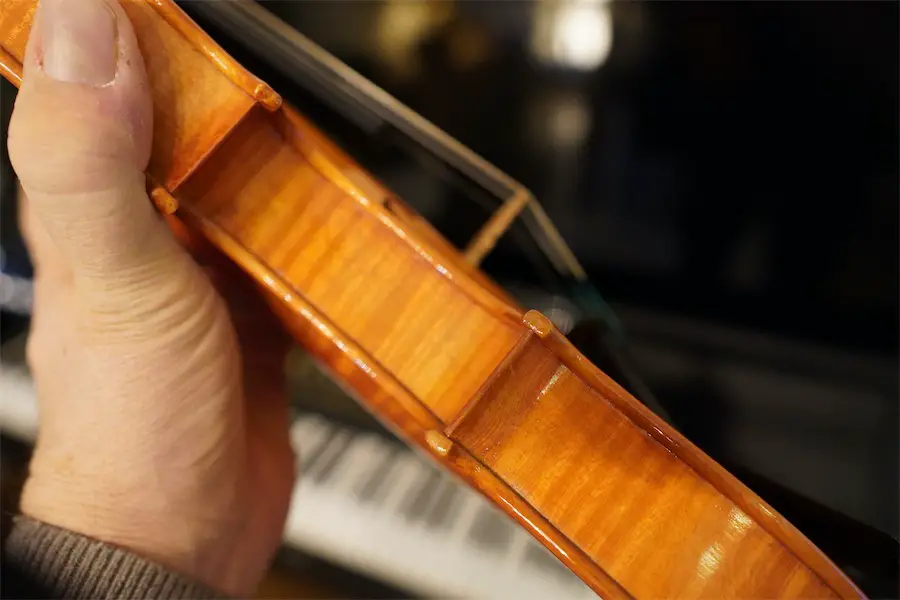
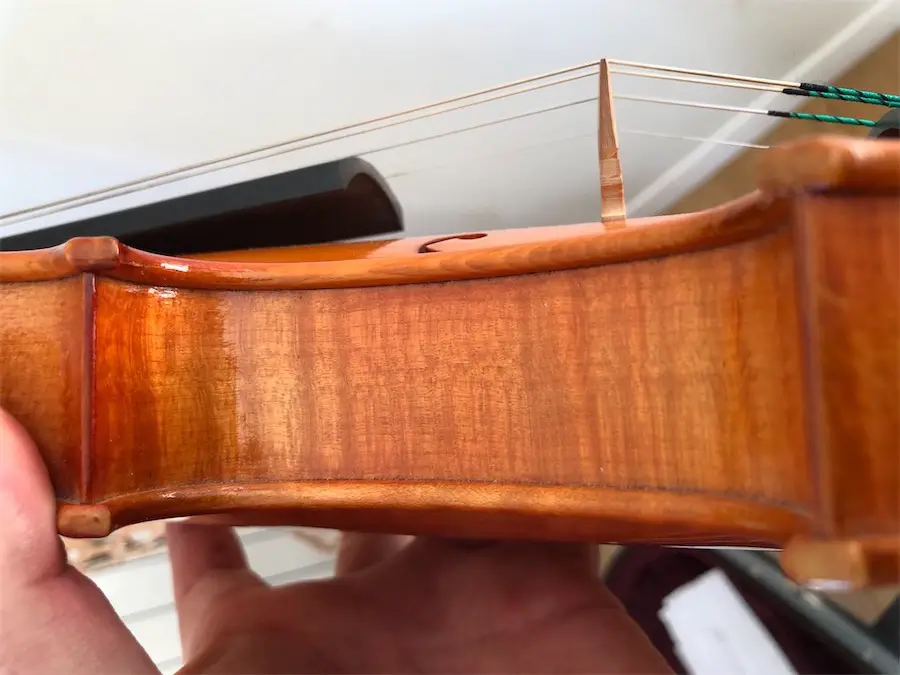
The position of the bridge shouldn’t move. But shocks due to everyday life, handling of the violin, transport, etc. can slowly move the bridge. The bridge is firmly held in place by the downward pressure of the strings. Its place is shown by the two notches on the F-holes. I have described how to place your bridge in this article. Let’s assume that the bridge is aligned with the notches, now check that there is the exact distance between both ends of the bridge and the F-holes. Alright, what we have just checked usually does not move too frequently. But what is crucial to check and correct is the angle between the bridge and the table. Each time you tune up your instrument, the strings slide towards the pegbox slightly, causing the bridge to lean towards the fingerboard. It is imperceptible but it adds up. If you take into account the pressure of the bow on the strings on the same side of the bridge, that is to say towards the fingerboard, you have the perfect conditions to make the bridge bend. The position of the bridge itself is preferably adjusted by a professional, but the angle of the bridge itself can be maintained by the musician (and should be).
When it comes to the position of the soundpost, it is trickier this time. The role of the soundpost is twofold. It helps the arch of the upper table to withstand the pressure of the strings and dissipates the downforce towards the bottom of the instrument. But as it serves as a link between the treble part of the bridge and the bottom that amplifies the high frequencies of the tonal spectrum, the exact position of the soundpost is crucial for the tone. Envision it as a natural tone control knob, if you will. If you change its place slightly, you will add treble, medium, or bass frequencies to the sound. A kind of equalizer. But this piece is subject to wear and tear as well. The differences in hygrometry and temperature, the vibrations, the dilatation of the instrument have an impact on its position and angle. But it is difficult to spot any problem and to correct it. Your maker will be essential for it. A special tool is needed that comes into a tiny notch in the soundpost. You need to loosen the strings in order to ease the tension of the table a bit to move the soundpost. And if it is too worn down, you need to have a new one cut. So do not hesitate to have it maintained by a luthier: the position of the soundpost is on the compulsory checklist.
Your luthier has a great eye to check if the fingerboard is flat. Even if it is made with hardwood, for example, ebony, it will still get worn down eventually by the constant vibrations of the strings and plucking of the fingers. The fingerboard won’t be perfectly flat and smooth after some time, and traces of wear will appear under the strings. It can be problematic for intonation if your fingers are not positioned as they should be. Your luthier will check that. He or she will be planing the fingerboard perfectly till it’s sleek and smooth. Your fingers will just fly on top of that. But it is not something you will have to be done often, but it is worth checking every year or two.
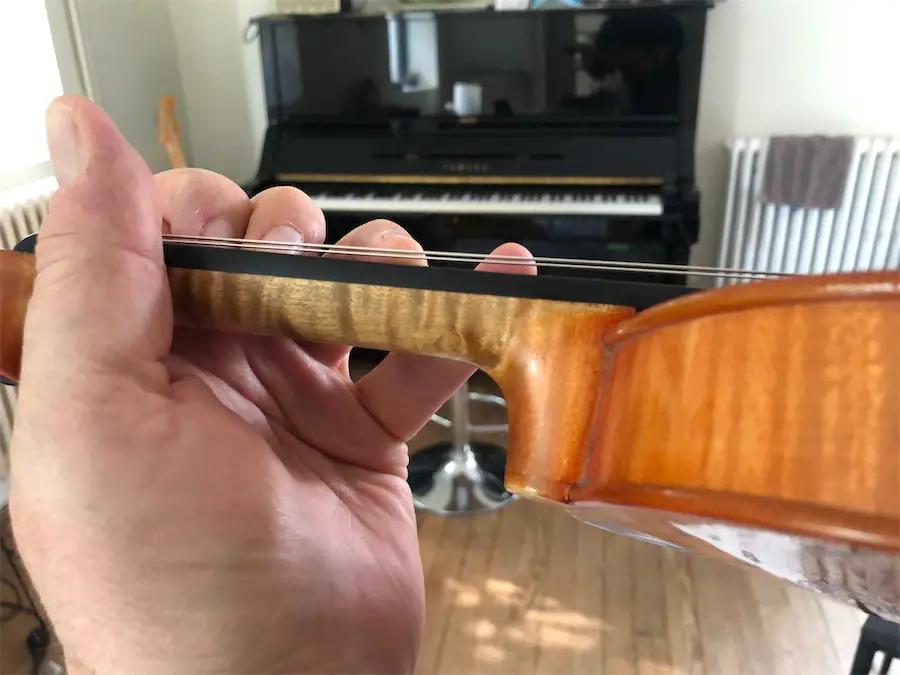
The straightness of the neck has to be checked as well. It is less commonly adjusted, for sure, but it is important because it can be the symptom of other kinds of problems. Basically, it is adjusted in conjunction with the height of the bridge, the height of the strings on the fingerboard – that determines playability – and the gauge of the string you use. So it is quite important overall. If you were to choose a string set dramatically heavier than the one your violin is adjusted with, you definitely should let your luthier know. It could cause the neck to bend slightly, the strings to go up, and playability will be really bad so with the tone. So the neck is important to check in a violin overall checkup and maintenance service.
2. What you can (and should) check yourself on your violin
There are many things that you should verify on your fiddle:
- Adjust the angle of the bridge
- If the strings become worn out
- If the pegs turn and stop correctly
- That the chinrest doesn’t touch the tailpiece, that the micro adjuster don’t come loose
- Clean your violin (we will adress that topic later)
I have already explained above the importance of the bridge placement and what should be adjusted by a professional and what you can do yourself.
Check your strings if you are not sure whether you need to replace them. Look for signs of corrosion, especially on the plain A and E strings. With time, the plating comes off and the core of the string is exposed which invariably leads to corrosion somehow. On the lower and bigger D and G strings, the winding can start to come off. Or it can gather rosin dust that is difficult to clean off. After this visual inspection, do not hesitate to use a magnifying glass to look for small signs that can have great consequences on sound. Check for the intonation of your 5th double-stops. They can be the symptom of bad strings as well. Whenever in doubt, you can ask for the opinion of your maker or just change the set altogether.
The pegs should provide a great service where they stick when we intend them to, but can turn easily if we need to tune up our instrument. For the pegs to work as intended, they need to be clean and not greasy. So never use any product that is not intended for them to clean them. Grease should of course be avoided at all costs as it will make them inoperant. Your violin won’t hold its tuning. I wouldn’t use Hill’s varnish cleaner either. A small amount of alcohol, maybe. If not, there is a product called Hill’s Pegs Compound that has been “cooked” by the great luthier. With that preparation, your pegs will turn and hold the tuning at the same time. I typically maintain and clean my pegs every time I change strings.
A visual inspection of the chinrest is important as well. It shouldn’t touch the tailpiece and hinder the full vibration of this piece. It shouldn’t be too tightly attached to the body of the instrument and damage the wood or varnish. Verify that your fine-tuners are not too loosened. The risk is getting an unwanted vibration or buzz sound. If your fine-tuner is too tight or loose, put it in its middle position and tune your instrument with the peg. Adjust with the tuner if needed. But you will have it in its medium position and won’t be surprised if you need to use it in difficult circumstances.
What do I need to check regularly on my bow?
The bow plays or rather IS an important part of the violin. It is a simple instrument in itself but is not maintenance-free. On your bow, you should verify:
- The camber of the bow
- The straightness of the bow
- The quality of the bow hair
- Clean your bow (we will address that topic later)
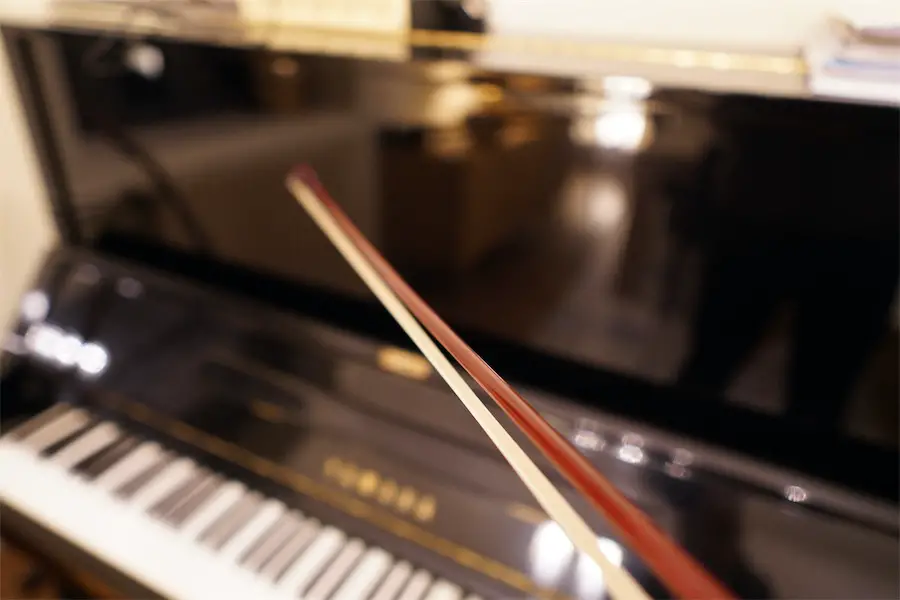
Camber. As a violinist, it is your duty to tighten and loosen your bow the correct way to preserve its camber. Do not tighten it too much, that is to say, do not turn the stick into a straight line or into a convex shape. The consequences could be irremediable to your stick unless your maker heats it up to reshape it. On the other end, always loosen your bow fully when stored to alleviate any strain to the elasticity of the stick. But even if you take great care of your bow stick, after years of playing and tightening, its camber might suffer. From time to time, check the shape of the stick when it is completely slackened. The convex shape should be really pronounced. In doubt, have it checked by your maker: he or she can correct it if needed.

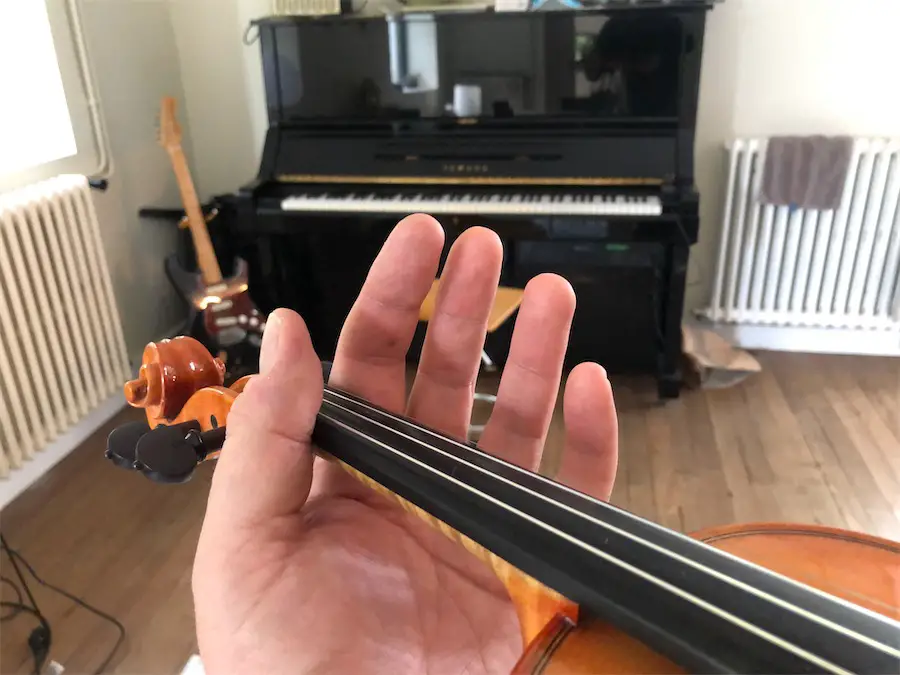
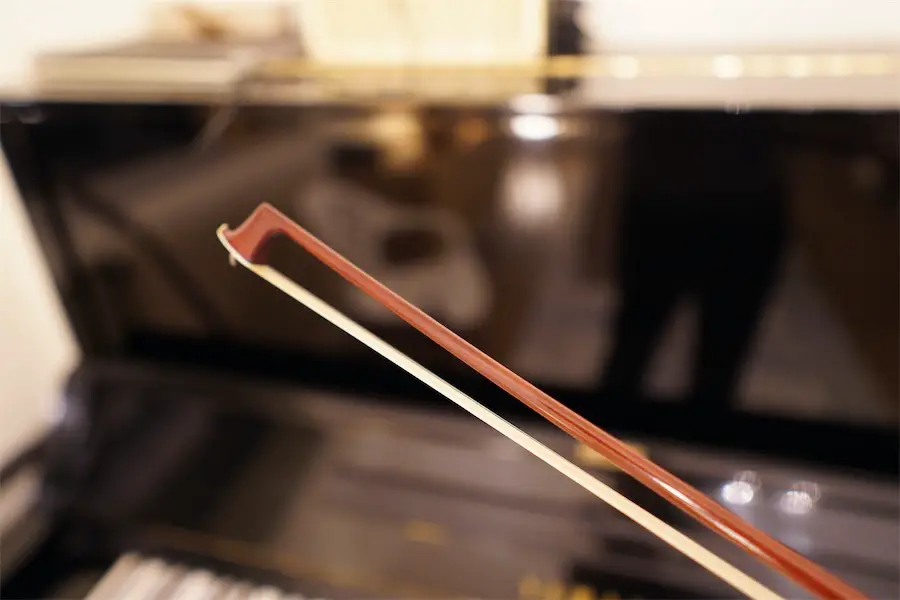
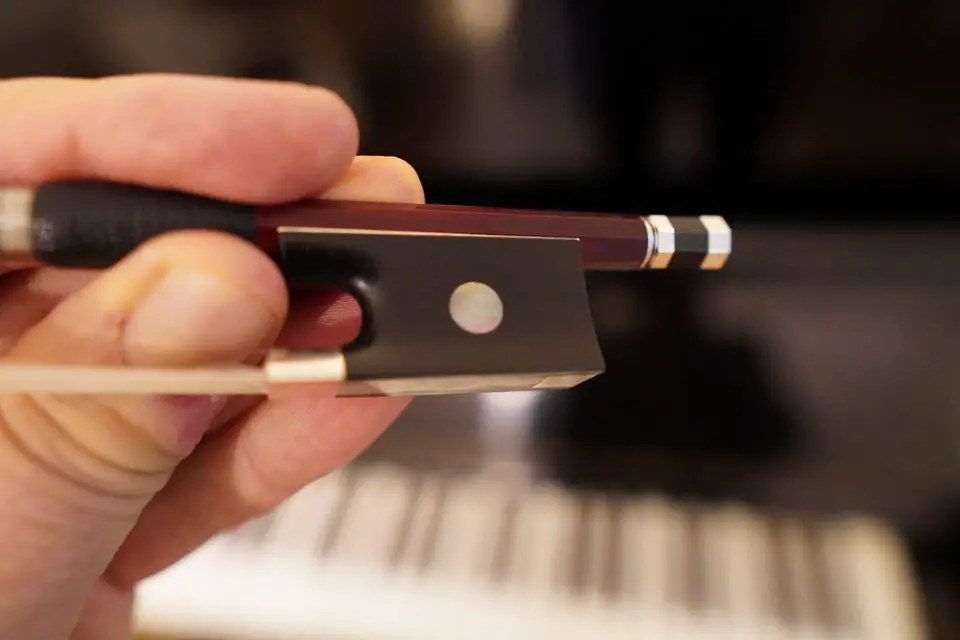
Your bow should be straight. Look at it carefully with perspective, with the frog in front of your eye. If you want to have clean détaché strokes, a good and stable spiccato, and stable chords playing at the frog, then your bow has to react cleanly to pressure and rebound. For that, it needs to be straight. There are many reasons why your bow straightness can be compromised over time. One can be a bad or irregular bow hair that holds tension in a different way from one side to the other of the bow. Or an irregularly worn out and broken bow hair. We will talk about bow hair in detail in the next paragraph. If you see that your stick is not straight anymore, ask for the help of your maker. They usually can adjust camber and straightness at the same time. If I can give you a bonus tip that my “archetier” or bow maker told me listen further. He does not recommend (or adjust) a stick in perfect straightness as we usually play with a slightly leaning stick towards the fingerboard. If the stick turns slightly towards the left when we look at it from the frog, then it has another kind of elastic behavior when playing. It becomes straight when pressure is applied to it when playing with a leaning stick towards the fingerboard.
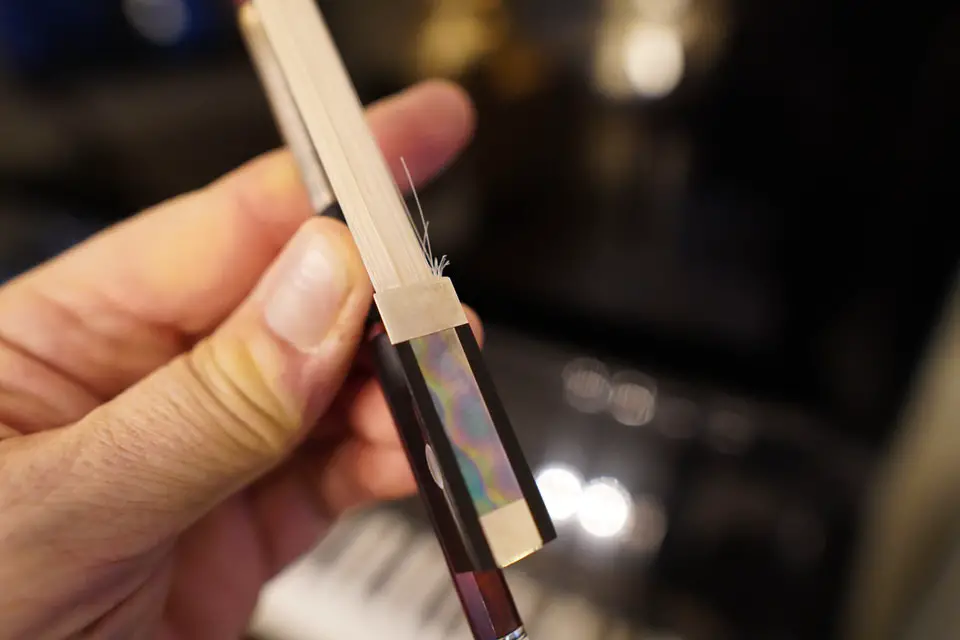
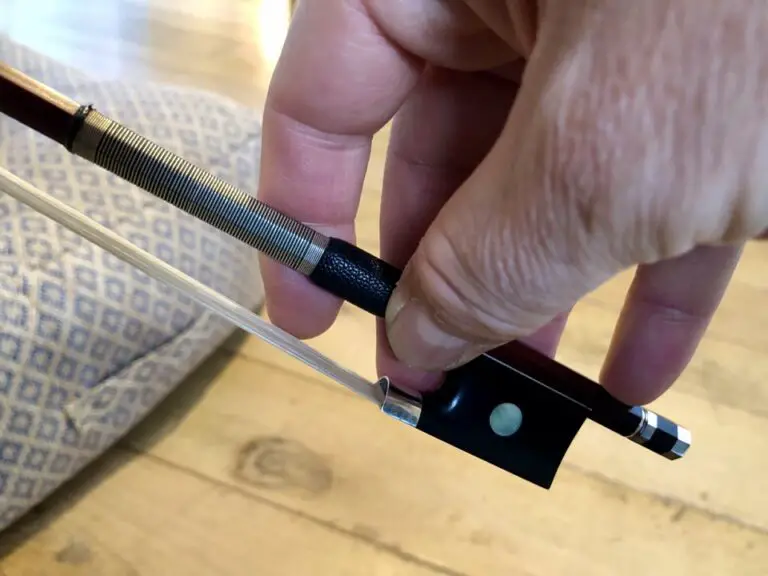
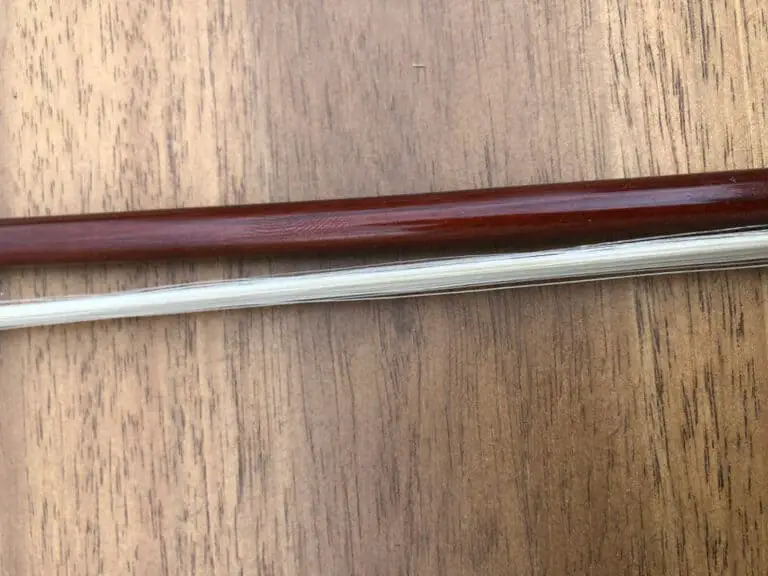
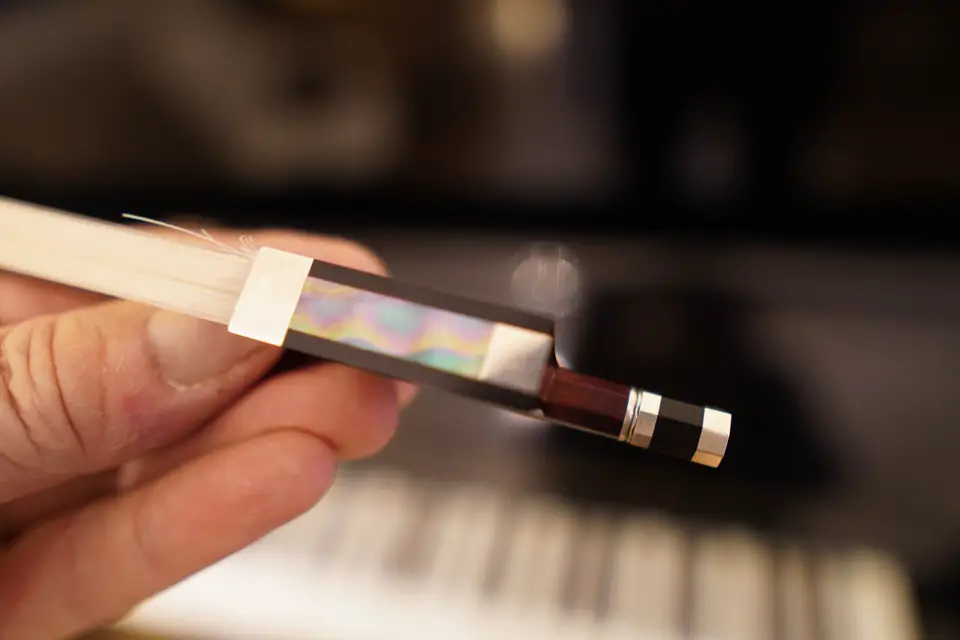
Check the quality of the bow hair. It is difficult to see if individual hairs are worn out, of course. But keep in memory when hairs break, if there are a couple of them, may be less than ten, it is ok as the hair counts up to 120 – 150 individual hairs. But if it breaks too often and when there are too many broken hairs, your stick might tend to bend and not be straight anymore (see above) your sound might be lacking fullness and timber. Chords might not be as stable as they used to. And all strokes that imply stick elasticity might suffer. Be extra careful if hairs break on one single side of the bow (see picture).
Keep your bow clean. We will detail that below. But even if a clean bow won’t improve the sound in itself, it will last longer.
I have detailed everything you need to do and know about bow maintenance in this blog post.
How to store my violin?
A violin is not a piece of decoration. Do not hang it on the wall or store it on a stand as guitars are sometimes exposed. Always store it in a good case, whether between sessions or for long-term storage.
Electric guitars are less fragile and their sound doesn’t depend as much on dust and debris. They are also more sturdy when they fall off than an acoustic violin. All the guitar heroes wouldn’t have done that crazy stuff if they were playing the violin! So I really don’t recommend a stand.
As for a case, choose a good hard case and please close it, do not put your violin inside while leaving your case open. I have ruined one of my violins like that. I have put it with its shoulder rest still on inside my open case. One of my children ran by and everything just fell off. Now my case is always close, even for a well-deserved 10 minutes break.
If you store your violin for the long term, ease of the strings a bit to alleviate the tension on the bridge and table. Tune down your violin half a step to a whole step and the strings won’t be as tense.
Inside your case, a silk bag offers additional protection to your violin as it provides another layer against differences in heat and humidity. An insulating layer, I guess. Try, if possible, to store your violin in a temperature-controlled room, and not in the attic or cellar.
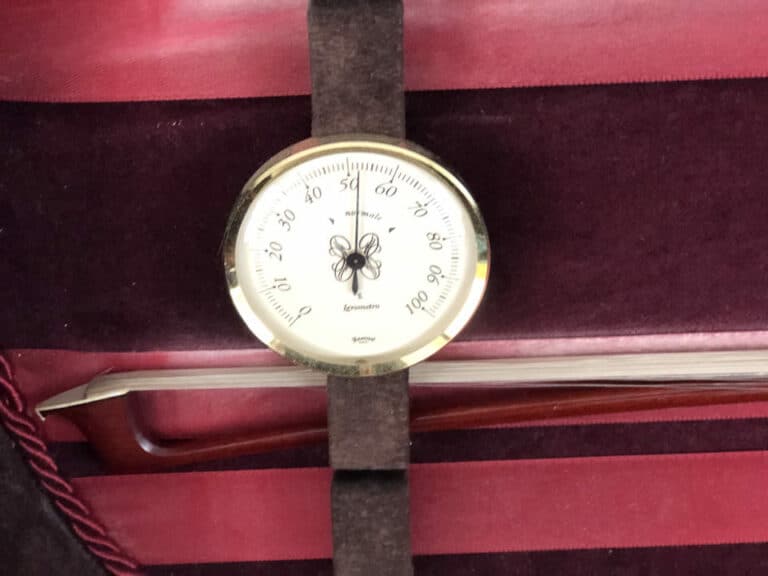
Lastly, a hygrometer is important. It helps you monitor temperature and humidity. If the air is too humid, you can add some desiccant, for example, silica gel, inside your case. If the atmosphere is too dry, consider using a damp-it(c). It consists of a rubber band or cable that you put inside water, clean off, and then insert inside your violin through an F-hole. There it slowly adds humidity inside the instrument to prevent the wood to become too dry and retract. It preserves the glued parts to crack. You sound undergoes that difficult time better.
Read further on how to store a violin in that post here on violintrend.com.
How to store my violin bow?
It is quite simpler to store your bow properly. Bear in mind that you need to preserve your bow hair and camber. That is basically it.
So clean off the rosin out of your stick after each session or so. Otherwise, it will become so sticky that you will find it hard to remove.
Very importantly, you must loosen the bow every time you are done playing. It is important to preserve your bow camber and consequently, its character, stability, and bounciness. Loosening the bow will also preserve the hair of the bow, as it will release the tension that the stick applies to the hair. It is good for the hair’s overall longevity. Remember that the hair is natural and constant tension can stretch and degrade it. The micro scales of the hair can suffer from that, and the sound would be worse.
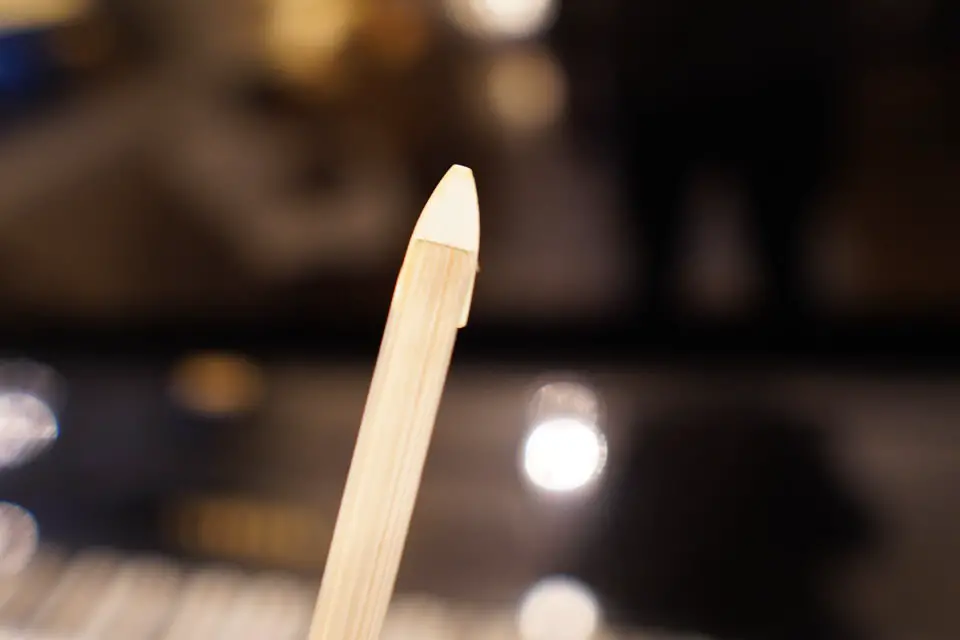
Store your bow in the case of your violin or in a special bow case. It needs a hard case as it is so fragile. The tip can be broken easily if the bow is dropped on the ground. You don’t want that.
Like the violin, the bow, in a hard case, would love being in a climate-controlled room for long-term storage. The wood and especially the hair might suffer from an atmosphere too dry or too humid. So if you travel, invest in a hygrometer to monitor that, and again, put some desiccant if needed in your bow case.
I have detailed the products and cases I use for my bow in that post.
When and how to clean my violin?
1. After each session
Well, you should clean your violin after each session, but a quick clean. The purpose of this quick clean is to not let rosin and dirt build up on the instrument. The best way is to remove it as soon as possible before it even gets the chance to stick to the table and strings. This importance is not so for aesthetics (though a clean violin is always more beautiful), but more importantly for sound. If rosin sticks to the strings, it will hinder the vibration thus the projection of the sound. Even the tone and bow response can be affected. The violin is such a difficult instrument to play, we should always make sure we have the best chances of success.
The daily routine is quite simple. Just clean rosin dust off the table, below the bridge with a clean microfiber cloth. Clean the strings, the top of the strings primarily, with a cloth. It will be white with rosin. Shake the cloth vigorously. I also clean the bottom part of the strings as well, even if it is a bit less exposed. I typically clean the fingerboard once a day as well with a dry cloth. Remember to always go from the peg-box side of the fingerboard to the bridge with a clean cloth. The peg-box side is contaminated with hand dirt and sweat; the more we go to the bridge, the more rosin sticks to the wood.
If I play a lot, I clean the strings and the fingerboard with alcohol, although it is typically my weekly routine.
To get the best attack, I somehow clean briefly my strings in between tunes.
2. Weekly fiddle cleanup
My Master always advised me to clean my violin on a weekly basis, in a more in-depth manner.
In my weekly cleaning routine, I do a kind of more in-depth daily routine, plus alcohol. I always use clean micro-fiber cloths for that, two of them.
Remember to never put alcohol on the varnish of the instrument.
I remove rosin from the table. I clean the fingerboard with alcohol and wipe it dry with another clean cloth; I insist on the strings with alcohol, top and bottom part. I slide the cloth under the strings from the nut to the bridge to have completely clean strings and get a plain vibration.
I wipe slightly (without applying any pressure) the whole body of the instrument with a clean (with no rosin residue!) cloth, without forgetting the part below the tailpiece, below the fingerboard, and the chin rest. I also clean the chin rest with alcohol to remove any dirt and sanitize it. If you do the same things, your violin should be shiny and ready for a whole week of (hard) practice. And the sound of the strings is at its best.
3. String-change cleanup special
Lastly, always take advantage of the string-changing session to have a great complete clean procedure for your violin.
On top of the weekly routine, I do a couple of things. I remove dust from the pegbox with compressed air and a hard brush. I remove rosin dust from inside the cuts in the bridge with the brush, without forgetting the part below the bridge, which is difficult to reach.
I put a small amount of (dry uncooked) rice inside the instrument through the F-holes. A spoonful of rice. I then shake the instrument for a couple of minutes. It removes the dust from the inside of the instrument. Sometimes you can see a small ball of dust inside, especially if it is not your instrument and it hasn’t been cleaned for a long time. Remove the dust with tweezers if needed (without scratching the varnish of the F-holes). If the dust is not visible, turn over the violin and the dust will come off when you shake the rice off the violin back through the F-holes.
A perfectly clean inside is important to maximize the vibrations of the instrument.
Then, I remove the chin rest with a chin rest wrench. It is not difficult, but care is important not to damage the varnish.
Then, I do some polishing work on the whole body. But again without applying too much pressure, without insisting. Remember that our instrument will live long past us and we shouldn’t wear the varnish with too much polishing. But still, I clean my instrument every string change time. With a cotton tab, I put a bit of Hill’s polish on the varnish, a small amount. I spread it on the whole body. And I polish with a clean cloth, lightly. It removes dirt, dust, rosin, and any contaminant, and it makes your violin shine. Again, with a clean violin and clean strings, it is the least you can do to optimize your tone and sound projection.
Here is my guide with pictures on how to clean a violin.
When and how to clean my bow?
1. After each session
After each session, I do not clean my bow. I loosen it carefully, for sure, but I do not clean it thoroughly. I just wipe off the dust rapidly on the stick.
2. Weekly
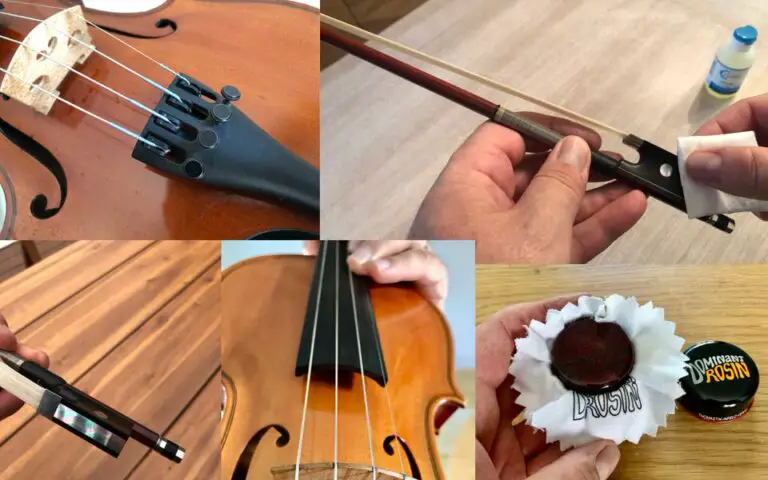
In my weekly maintenance schedule, I take a cloth, not perfectly clean because it will get a lot of rosin dust. I tighten my bow more than usual to have room between the hair and the stick. I remove the rosin there. With another cloth, a clean one this time, I clean the upper part of the stick. Lastly, I clean the frog with alcohol to remove sweat, dirt and sanitize it. But I do not put alcohol on the pernambuco wood. Only on the metal, mother of pearl, and ivory part (or their equivalent in modern bows).
3. Every time the hair is changed
When a bow maker changes the hair of the bow, he or she typically cleans (or should clean) the wood of the stick with a secret sauce product.
If not, I always clean my stick in the following manner. I take a cotton tab and spray some alcohol on it at a small distance. The cotton shouldn’t be wet in any way, but there should be droplets of alcohol on it. I clean softly the wood with that, insisting on the part of the stick that gathers the most dust.
I clean the frog as well if it is not already done by the maker, as I have explained above. I finish by adding a tiny amount of grease to the screw to ease the tightening and loosening of the hair.
Read further my how-to guide with pictures here.
When and how to change strings on my violin?
1. How often do I need to change strings?
It is generally a good idea to change strings when you witness the following:
- The winding of the strings gets damaged;
- There is some corrosion on the strings,
- Rosin is hard to clean off and is glued onto the strings,
- Double stops are out of tune, particularly fifths.
- The sound loses its edge,
- The violin doesn’t hold its tuning
Typically, with old strings, you lose sound quality, ease of playing, bow response, intonation. Then it is time to change strings. A student player can confidently play on the same set for a year, a professional player can change two to three times a year. It as well depends on the type of sound your aim for. If you lure for clarity and brightness, change more often than if you prefer warmth and sweetness.
But there is more to that, as I have detailed in that post dedicated to when to change your strings on your fiddle.
2. How do I change strings on my violin myself?
Changing a set of strings on your violin is not that difficult if you know what to do and are extra-cautious. The violin is a delicate instrument and many things can be damaged, if not broken. It is important to respect best practices (and my top tips!) as well if you want to get the best sound out of your beloved instrument.
First, remember to never remove all the strings at once, as you can do on a guitar. Because without any strings applying force, the bridge will fall which is already a problem. It is not easy to replace the bridge in the exact position where it should be, once the strings are put back on the violin. Then you might as well risk moving the soundpost. WIthout down pressure to put the table of the violin on to the bottom, the soundpost, which is not glued, might fall. If so, only a luthier will know how to put it back in place. Never reinstall strings on your violin with a fallen soundpost, as it will be as an arch without a column: everything will collapse (the table will break).
After you are finished cleaning up the pegbox, clean the fingerboard with a cotton tab and some alcohol while it is easy to access it.
A string at a time, start with the fourth string, the G string. Remove the old one. Clen the pegbox and the peg with a microfiber cloth, without additive (except Hill’s peg compound if needed). Put some graphite on the notch where the string sits in the nut to ease it when you tune your instrument (use a 2B pencil). Put your string in the tailpiece and pull it firmly several times to prevent it from being wound, turned on itself.
The sound will be less good if the string is not straight. I also add graphite in the notch of the bridge to help the string slide from one side and the other of the bridge if needed. Then insert it in the string in the peg hole; help yourself with tweezers if needed. I do one wind on one side, and the other on the side of the pegbox wall because I like it when the string transfers vibrations to the wood. That’s it, start to tune up your G.
A bonus tip: if you see that, once tuned up, your peg gets in the horizontal position, loosen it, pull a bit with the tweezers, and tune your string till the peg is vertical (at a 90° angle) with the pegbox. By doing so, you will get space between the pegs for your fingers to fit and tune your instrument easily. It is all the more so important as you shouldn’t have fine-tuners on these strings for tone reasons. So you will spend a lot of time with your fingers on the pegs while you tune your violin.
Repeat for all the strings the same way. Clean the pegbox, the peg, the fingerboard, insert the string, pull it firmly, add some graphite…
The only thing to be careful with the E string is with the small “sleeve” that protects the wood of the bridge from a string so thin, it would cut into the wood. Place it into the notch on the bridge, without it sticking out on the string on the fingerboard side of the bridge: you don’t want anything to hinder the vibration of the string in any way.
Now enjoy your new shiny sound. Let the strings settle for a couple of days to get the best characteristics tone-wise and also get a stable tuning. Brand new, the strings might sound a bit too harsh. The best sound will blossom after one or two days. So factor those in when you plan a concert.
When to re-hair my bow?
A bow re-hair is not something you can do yourself. Ask for the help of your maker, violin maker, or preferably, bow maker if you live in an area where there is one. A bow maker is specialized in bows, makes them and not violins, and will typically give you better advice than a regular violin maker.
Let’s not forget that bow hair is a wearing part, like violin strings. They are not here to last too long. Of course, it will depend on how much you play, on your career (amateur vs professional), on the number of bows you play each day, and of course your budget. As a basic rule of thumb, an amateur can re-hair his bow every two years. A student who plays a lot should consider re-hairing his or her bow every year or so. A professional player should have a bow re-hair twice a year.
A typical violin bow has between 110 and 140 individual bow hairs. François Tourte, the famous 19th-century-maker, used to have one of his children count them for him, to the number 120. So when you start to find that hairs start breaking too often, and too many, this is a good sign to re-hair your bow.
Changing bow hair is important both for the sound and the longevity of the stick. For sound, let’s remember that the hair has micro scales that keep rosin and pluck the string to generate sound. When these scales are worn out, and they eventually will, the sound will suffer; it will be time to get a new hair to have a fresh sound. Lastly, the number of bow hairs and their even distribution will play a big role in the bow’s stability and agility (bounciness). Furthermore, an imbalanced hair can start to slowly bend the stick, something you don’t want.
Shopping list for your violin and bow maintenance
Here I have made the list of everything I recommend to take care of your violin and bow.