How to Clean a Violin? A step by step guide with pictures
To sound well, a violin needs to be clean. It is good for aesthetics, but more importantly, for sound and vibrations.
Cleaning a violin is not hard if you follow the steps. Use some alcohol, a violin polish, and several microfiber cloths. Now read on.
List of products and tools to clean a violin, viola, cello, or bass
This is the list of what I use to clean my violin thoroughly:
- several clean micro-fiber cloths;
- dry compress air;
- a hard brush;
- a bottle of 70% alcohol;
- Hill’s famous violin polish;
- a small handful of raw, clean, dry rice;
- Hill’s peg compound;
- a string cleaner product;
There is one rule. Always keep two clothes: a rosin-free cloth and a cloth that you use to remove rosin because you don’t want to spread rosin where there is none naturally.
I always use dry compress air: I do not want liquid air to fall on the varnish and evaporate instantly as it gives a thermal shock to the varnish (it is extra cold).
The two last elements of the list (the peg compound and the string cleaner) are unnecessary: you can do without. See below.
Clean your violin for the sake of aesthetics but also sound
It is important to have a clean violin. Of course, this beautiful instrument deserves a pure and perfect aspect. But also, clean wood vibrates freely. Everything works better when clean: the pegs make it easier to tune the instrument, the strings vibrate best when clean, the table prefers to vibrate when free of rosin, and so does the bridge. The fingers and hand slide easier on a clean neck and fingerboard. And lastly, the violin sounds better without dust inside.
How often should I clean my violin?
There is no one answer. But in the worst-case scenario, you should do it at least once a year when changing your set of strings. If you change your strings more regularly, as advocated here, you should clean your violin every time you change your strings, that is to say, every six months at least.
But a complete clean-up can be done once in a while, but there are still parts of the violin that you should clean on a more regular basis. For instance:
- The strings should be cleaned after every playing sessions;
- the rosin should be removed from the table after every playing session;
- the fingerboard should be cleaned every day;
- the chin rest should be cleaned with alcohol regularly, at least every week.
As many luthiers have advocated, the varnish shouldn’t be polished too much and too often. Polishing the violin itself is not something to do every day. I would say once or twice a year, and without force, very gently.
So let’s see how we do it in detail.
1. Clean the pegbox with a brush and compressed air
The pegbox typically gathers dust. It is a remote place in our violin that we often forget about. It is some kind of a hidden corner. But a clean pegbox isn’t just satisfying to watch; it is also the best way to tune your violin consistently.
The pegbox is not varnished, and the pegs need to stick in place. So do not use any product in this part of the violin: no water, no soap, no polish, nothing.
I typically clean the pegbox by removing dust with a heavy brush that goes in all corners. When dust is free, I finish the job by blowing compressed air. If you have enough room (depending on the pegs still in place), you can wipe with a micro-fiber cloth.
The pegs should remain dry and clean. They need to be grease-free to operate the way they should. That is to say: turn when we tune up the string, and stick (hold the string) when we expect the note and thus the tuning to remain stable.
I just wipe my pegs slightly with a clean, dry microfiber cloth when I change strings. If the peg is too loose, many things can be done as I explained here. But you can apply some Hill compound where the peg is in contact with the pegbox. It allows the peg to turn easily but helps it to stick. It comes as lipstick and is worth the price on Amazon.
If I clean my violin without changing strings, I do not remove the pegs to clean them as it would be unnecessary and damageable. It is not advised to take off a string and put it back again on a violin and wind it back into tension as it deteriorates sound.
2. Clean the fingerboard with alcohol
I typically clean my fingerboard every day with a clean microfiber cloth. The important thing is to remove rosin: your fingerboard should be rosin-free at all costs.
I often clean my fingerboard with 70% alcohol. As it is made out of Ebony, there is no problem with the wood whatsoever. There is no varnish on the fingerboard, even if your violin has a rosewood fingerboard. So alcohol on a micro-fiber cloth is the easier way.
3. Clean the strings with a string cleaner
It is crucial to have perfectly clean strings if you want to have a good sound or the perfect sound you shoot for.
There are two ways the strings are dirty:
- strings gather rosin dust. The strings become white close to the bridge as soon as you start playing your instrument. So always wipe off the excess of rosin dust when you have finished playing your instrument. Use a clean, dry cloth for that.
- finger dirt, skin cells, sweat, dirt, rosin stick to the strings in a way you even can’t notice with your bare eye. Small layers of rosin gather up below the strings. Dust sticks with rosin and gathers in the winding of the string—eventually, all that will remove the brilliance and sound quality of your strings, or even violin. To clean your strings more, more in detail, and get rid of that dirt, use a cloth with alcohol on it. The alcohol will help dissolve the greasy contaminants that are present on the strings, but also the rosin that holds the dirt. Do it several times on the upper part of the string, and also, don’t forget the bottom part.
To clean the strings, I typically use 70% alcohol. But you can also use a strong cleaner such as this one on Amazon. It even comes cheaper than alcohol.
I put some product on a micro-fiber cloth and wipe it with the fabric. I do not use cotton cloth because I do not want the cotton to leave small parts, yarns all over the place.
It is safe to apply a string cleaner or alcohol on the strings or the fingerboard, but do not apply these products on the varnish!
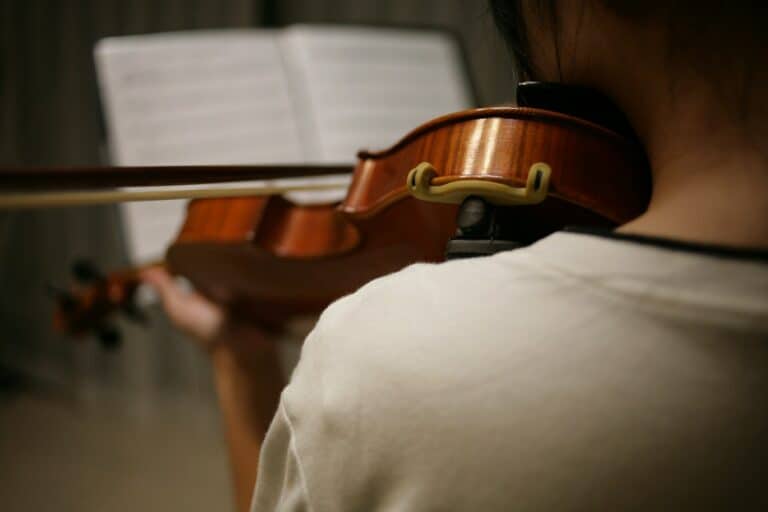
4. Clean the neck with a cloth
The neck is where your left hand and thumb work when playing. You typically want a clean neck to perform great position shifts.
This part of the violin is protected but not varnished. So I do not use alcohol to clean dirt and rosin there.
I either wipe the neck with a dry cloth, or I use a slightly wet cloth with soapy water and dry immediately.
5. Clean and polish the top (table) and bottom with Hill’s polish
If you clean your table, ribs, and bottom once a year (or even every six months), you should always remove the chinrest to do it perfectly.
When removing the chinrest, be careful not to scratch the varnish of the ribs under the chinrest. Once the chinrest is off, you will notice dust underneath.
As I have explained above, do not over polish your violin. Remember that it is a fragile instrument. The varnish is not that thick and is supposed to last for… centuries. If you remove a layer worth a couple of microns every six months, it won’t remain a lot of varnishes soon enough. Remember: as the great Ivry Gitlis puts it, you don’t own a violin. You are just a part of ITS life. So keep your violin in good condition for the following generations, especially if your violin is a fine instrument with great value and history. Many Stradivari and Guarneri have suffered from over-polishing over those years.
All right, it is not a reason to keep our daily driver dirty, though.
I put some Hill polish on a cotton swab. I sometimes use the compound that my luthier makes. But Hill polish is cheap and easy to buy on Amazon., but I typically use that polish.
I use a small amount of the product as I clean my violin twice a year.
I spread the product on the violin as if I was painting on the table, bottom, and ribs with the cotton swab.
Then I use a clean micro-fiber cloth to spread the product, and I start polishing my instrument without applying pressure at all. Do not forget to clean under the tailpiece. The part underneath the chin rest (removed) requires a little more effort.
I apply just a little bit of force as the idea is more to gather rosin and dirt away from the instrument than to force dirt into the varnish.
I wipe the instrument the last time with a clean cloth. Your instrument is now clean and shiny. And a thin layer of polish protects your varnish.
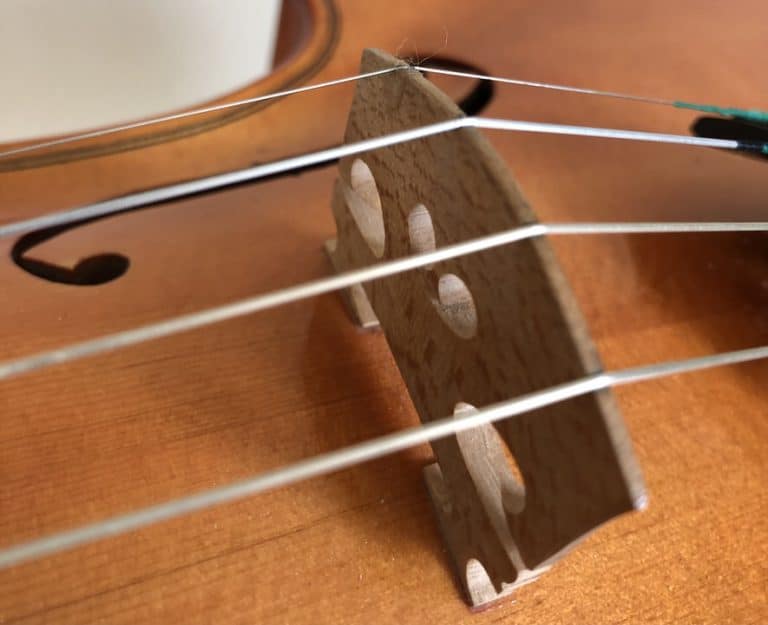
6. Clean the bridge and under the bridge with a stiff brush
The bridge is a violin part that we often forget to clean. It is easy, though. We never clean the bridge because it is made of light wood (as opposed to dark wood). So rosin dust is not visible there. The idea is to remove all the dust that can’t be seen and builds up unnoticed.
I just use a clean brush to wipe off the dust. The brush can reach through the holes of the bridge. Lastly, I do not forget to clean under the bridge. A lot of dust can gather there. It is as ugly as it hinders vibration. I’m not too fond of a dirty bridge…
7. Clean tailpiece and chinrest with a cloth and alcohol
Now that the chinrest is removed, it is easy and quick to clean. I use alcohol on a microfiber cloth. It becomes clean again, quick and easy.
The tailpiece is easy to clean as well. Of course, if we don’t take it off, it is difficult to reach the bottom part of it. But do not remove your strings just for that, as the soundpost will fall, and you will have to go to a luthier. You can reach below the tailpiece just enough to have it clean on each side. I use alcohol as well to clean the tailpiece. (Beware not to spill some on the varnish). I spread some alcohol on a cloth. To clean the micro-tuners (and the holes where the strings are attached), I use a hard brush and then compress air.
8. Clean the inside of the violin with raw rice
Yes: you have read it right. It is essential to have a clean violin inside and out to have the best possible vibrations out of that magical wooden box.
Your luthier can open a violin: but you don’t have to!
To clean your violin inside, put a small handful of rice inside your violin through the F hole. And then shake your violin for 3 to five minutes. Try to clean all the sides and corners of your instrument. Have a look inside and try to see some dust-gathering as a small ball. Sometimes, you need small tweezers to extract that ball. Then put your violin upside down to let the rice fall naturally through the F-holes, bringing the dust that has been freed with them.
Use clean, dry raw rice only to clean the inside of your violin.
9. Last tip: prevent rosin from spreading and sticking on the instrument
This last tip has been given to me by my master. If you want to keep a violin clean longer and clean it more easily, you should protect the part between the fingerboard and the bridge. But how to do so without it being noticed? With a transparent sheet of plastic wrap. Cut the plastic in such a shape that it fits below the bridge and holds on to it. Here you go: you have perfect protection that is unnoticed! Next time you clean your instrument, you will find it much more manageable.
Of course, this protection is only for the long hours your practice at home. Please remove it from your exams and concerts. Now, go play with your new shiny instrument!
Now, to avoid risking any damage to your instrument, read on my violin and bow maintenance mega guide.