How to Rosin a Bow: the Simplest Guide in 5 Steps
Whether you have a new bow or a freshly re-haired bow, it is essential to put rosin on it to make any sound at all. Bows without rosin can’t be played.
How to rosin a bow? Break in your rosin with sandpaper. Gather the dust with your bow hair. Do that a couple of times. Your bow will have enough grip to bite into the rosin. Make up and down motions with your bow to pick up rosin dust. Do not forget the frog and the tip. Do that each time you play your instrument.
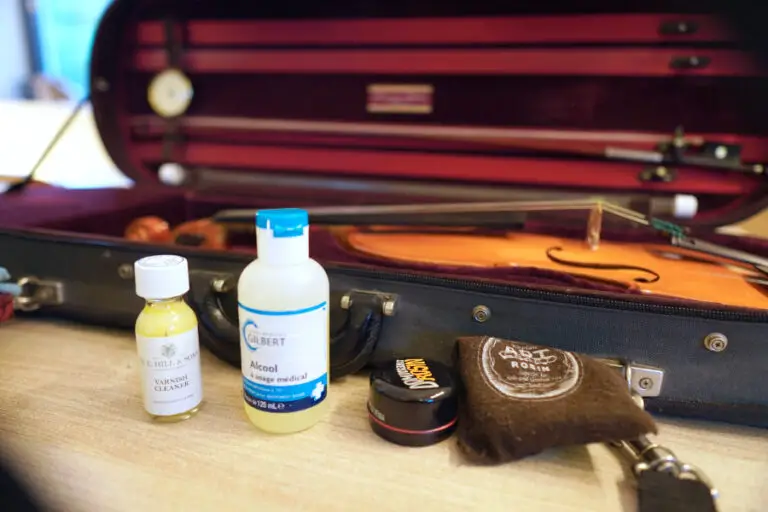
Rosin is a compound made from pine tree sap that comes in cakes. It is sticky and smells good like pine trees. Once asked about the only thing he didn’t like about the violin, Yehudi Menuhin replied without hesitation: « Rosin! » It is sticky, it makes white powder we need to clean off the violin, yet it is essential to all orchestra string instruments. That is why we surely need to learn how to apply rosin the right way. Don’t forget to check the rosins I have tested and approved in my recommended products page.
Table of Contents
1. How to rosin a bow for the first time?
Is your bow hair new or pre-rosined?
If your bow is not new and has been used it will be quicker to rosin as the hair will stick and grab some rosin dust quicker, even if the cake is new.
It is the same if your bow maker has pre rosined the bow. Bow makers do not have time to rosin all the new bow hairs. For that matter, they buy already made rosin powder that they spread quickly on the hair. This greatly speeds up the rosining process as the powder helps the new hair to stick and bite into and wear the new rosin cake.
If your bow has not been used or pre rosined, it will be trickier. Envision that your bow hair is made of horse hairs. Even if on a microscopic level hairs have scales, they do not provide sufficient grip to the rosin (or strings). The scales will help to hold the rosin into the hair and grip the rosin or strings.
2. Open and prepare your fresh rosin cake
All right, you’ve chosen now the type of rosin you prefer. You have with you your brand new rosin cake.
You can’t apply rosin just like that with a new cake. The surface is so smooth that your bow won’t bite in it.
If your bow has not already been rosined or pre rosined once, the new hair will just slip on the cake as it will slip on the strings: without grabbing anything.
Buy and put on a flat surface 400 grit sandpaper. Start to slowly sand the surface of your new rosin cake three to four times until some powder appears on it.
3. How to put rosin on your bow
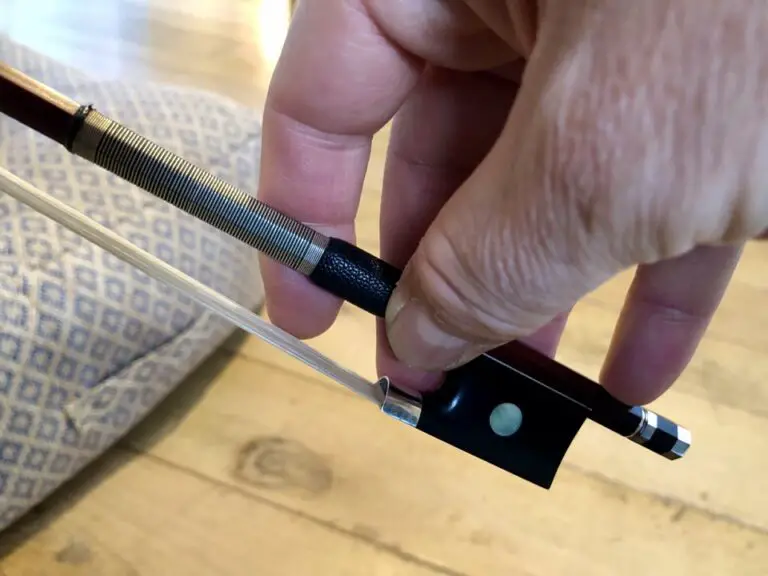
Now that your rosin cake is ready, tighten your bow to rosin it. You can’t rosin a loose bow, as you would put rosin on the wood of the stick as well. This is something you do not want. If you begin and are not sure how to tighten a bow the best way, I have written a comprehensive guide on that subject.
Now, you can rosin your bow.
Now gather the powder with the bow gently. Do not apply pressure. You do not force rosin into the bow, you just pick up rosin dust onto it. This distinction is important as you will save wear to your bow hair: it will last longer.
Do that again. Sand the rosin slightly a couple of times. Gather the dust with the bow. Sand and gather.
You will see after a couple of times that you won’t need to go on sanding the rosin. The hair of the bow will start to bite and stick onto the rosin and will be able to gather rosin from the cake itself and not solely the powder on its surface.
Remember again not to force rosin into the bow hair by applying force. Just gather and pick up the dust lightly onto the hair.
Alternatively, if you do not have sandpaper, I have successfully used a nail file. It is not as good but can come in handy before a concert.
4. How to rosin your bow everyday
Now let’s forget new bows. How should you rosin your bow in everyday life?
Every time you get ready for a playing session, you should rosin your bow. But now that it isn’t the first time, it will be consistently quicker.
As a general rule, never touch the hair of the bow if your fingers. You will contaminate it with the natural oil from your fingers. This contaminant will hide in the scales of the hairs and it will be difficult to rosin the bow or play the strings. The hair of the bow needs to be extra dry and clean to stick to the rosin and grip the strings.
Of course, tighten your bow the correct way before putting rosin on it.
- if your rosin hasn’t be used for some time or if it is a bit too smooth, you can wake it up again by sanding it slightly with 400 grit sandpaper.
- remember, you are not forcing rosin into the hair. You are rather picking up dust naturally into your bow hair.
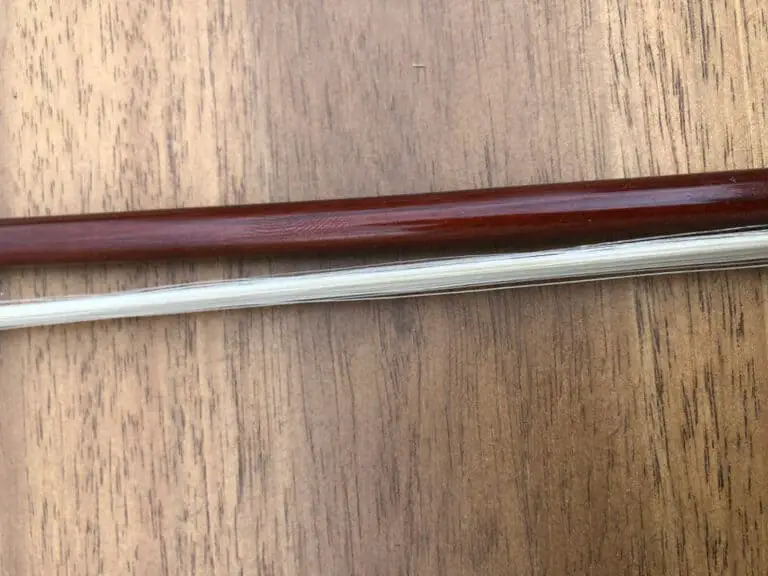
- run the bow from the frog to the tip in a gentle and regular gesture and back again from the tip to the frog.
- don’t forget to insist a little bit at the frog and the tip of the bow to have an even rosin quantity throughout the hair. You need good grip when you start a phrase at the frog or at the tip.
- do not only make an up and down motion with the bow. Rotate it with your fingers in order to even out rosin throughout the hair. If you don’t do so, you risk having rosin on one part of the hair, but none on the part of the hair that faces the stick. However, when you play, you will slightly lean the bow naturally towards the fingerboard. Then, the hair is not flat anymore on the strings. That is why you need some rosin to be spread all around individual hairs, not only on one side.
- do this maybe twenty times and you are good to play.
- if in doubt, shake your bow in the air doing large motion. The friction of the air to the bow hair will naturally remove excess rosin powder.
I would recommend putting rosin on the bow every time you play. If you play a couple of times every day, I would rosin the bow again, if not a bit less. But all the white powder that you find on your violin is less rosin on your bow hair. So keep in mind: every time you need to clean your violin, you should rosin your bow again.
5. How much rosin is enough rosin?
Generally speaking, if in doubt, I would recommend putting too much rosin than not enough. I have heard and read that having too much rosin gives you a harsh sound. I haven’t witnessed that myself. When I tried putting too much rosin on my bow, the first thing I see is a white cloud around the bridge of the instrument.
Excess rosin naturally falls off the hair. If you are violin savvy enough to tell the difference of grip of your bow to the string and knowing the sound difference, I bet you are not reading this blog. So, for beginners to intermediate violinists, do not fear putting too much rosin on your bow. And anyway, I will give you a simple trick to get rid of excess rosin.
- If your bow doesn’t have any rosin, there is no way you can hear a sound. Your violin just doesn’t work. I have given all the details on that blog post.
- If your bow doesn’t have enough rosin, your sound won’t be consistent. You will feel some grip, yet unevenly. Some parts of the bow will be grippier than others. As a consequence, the sound will vary in timber and in volume. This is to avoid. If you are a beginner, you might not note it. That is why I say do not risk having too little rosin on your bow by fearing having too much.
- If you have rosined your bow the way I have demonstrated, you should have just enough rosin. Keep in mind that this is not a scientific perfect process. There is a range that can be acceptable. Some advanced players can experiment with the quantity of rosin they use depending on the type of repertoire.
- So, what happens I you put too much rosin on a bow? If you put too much rosin, you do not risk much. The sound will be heavier as the hair will grip the string a bit too much. Your violin will be white quickly with the rosin powder spreading around the bridge. You will be breathing rosin and smell that particular pine smell. Unless you are a soloist, or a good student practicing sound production, this is not too important. When you see a cloud of powder around the bridge, you can just stop for a second, clean your instrument, take your bow and shake it in the air to have the air friction naturally remove the excess of dust. This should be enough to get an acceptable amount of rosin.
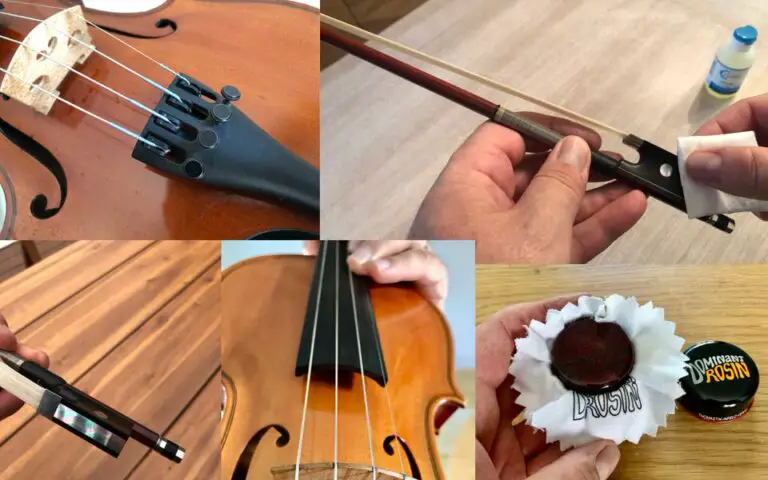
Remember: to have a good sound, your bow should be well rosined but your string should be rosin-free! That is why you should not let the rosin build-up on the strings: that will prevent it from vibrating properly. So clean your strings at a regular interval. Some soloists even clean the string they will start an important phrase with, with the help of their right-hand thumb. So if you have long-lasting playing sessions, you can clean your strings with a cloth in your pocket. At least, every time you put your violin back in its case, you should clean your strings: the upper part but also the bottom part of the string.
Troubleshooting: Why is my rosin not working?
You can check this article on The Strad on many rosin types compared. But, there is one simple answer: you haven’t broken in your fresh rosin cake. As I have explained above, put some 1000 grit sandpaper on a hard and flat surface and slowly sand your rosin. You will see some white powder that will transfer easily to your bow hair. Do that maybe five times, and the powder in your bow hair will help to grip the rosin cake without the help of the sandpaper. IF you don’t have sandpaper, you can use a nail file.
Lastly, do not rosin your bow too quickly. The friction of the hair of the bow on the rosin quake will have it melt (in a microscopic level) and will stick to the hair. As opposed to a light dust, you will have a sticky material that will make more bow noise. This is not something you want. Always make light and regular bow strokes to rosin your bow. Read on my article on why my violin doesn’t make any sound.