Where to Place the Bridge on a Violin? Don’t break the table!
So you have to replace your bridge. I have resisted the urge to touch a violin’s bridge for so many years that you scare me! But maybe your strings changing have gone wrong, or you have just received a violin without a bridge in place. So, read on.
To place the bridge on a violin, make sure the upper part is towards the G string. Then, place it between the fingerboard and the tailpiece where there is a notch in the F-Holes. Measure to have the exact same distance between the F-Holes on each side. Lastly, make sure it forms a 90° angle with the table.
But, many things can go wrong: read on to see:
- Why you shouldn’t touch a bridge unless you have to, what can go wrong
- How a bridge as to be prepared for each and every violin
- How to place a bridge
- A violin without a bridge
You shouldn’t mess up with a violin’s bridge
A bridge is not “user serviceable.” As a general rule of thumb, a violinist should never remove the bridge of his or her violin. It’s the luthier’s job. That is why we shouldn’t remove all four strings at once. If nothing holds the bridge in place, it will fall off as it is not glued. The other risk you take is sly as you might not notice it: your instrument might break! Here is why.
I have explained in my post regarding what is glued on the violin. The soundpost is held in place by the pressure of the strings on the table. That pressure compresses the arch of the violin slightly. The soundpost is just squeezed between the table and the bottom. Without strings, there will be no downward pressure. The table will naturally go up slightly; the soundpost will come loose and fall.
It is difficult for us mere mortals to put back the soundpost in place without a unique tool. If you notice it, rush to your luthier: he or she will install the bridge and soundpost in no time.
The problem is if you didn’t notice your sound post has fallen off. You reinstall your bridge, wind up the strings, tune your instrument… and crack! The table can’t hold the pressure without the underlying pillar. Now the table is cracked or even completely broken! The repair is expensive: you might even have to replace the table with a new one. It is a lengthy and costly process. If your violin is good, it might be worth it. If you just have messed up with a cheap violin bought online, you can change its destination right away: it could do a nice decoration on your wall (though I don’t like hanging violins…) or light the barbecue with it… That’s how risky messing up with a bridge is.
A new bridge has to be prepared for its violin

In this article, I have assumed that the bridge has been made for the instrument you try to put it on. Do not decide to change bridges yourself and buy a new one off the shelf, albeit of better quality.
the first time, there are a couple of tasks to accomplish first:
- the feet of the bridge must be flat on the instrument. But the table has the shape of an arch,
- the height of the bridge is at its maximum. A luthier adjusts that height to the actual angle of the strings on the violin, determining the strings’ elevation on the fingerboard.
- the luthier cuts the slots on the upper part of the bridge to receive the strings.
These tasks are challenging to execute and are not meant to be done by the end-user. A good quality bridge badly prepared will end up worse than an average bridge carefully crafted.
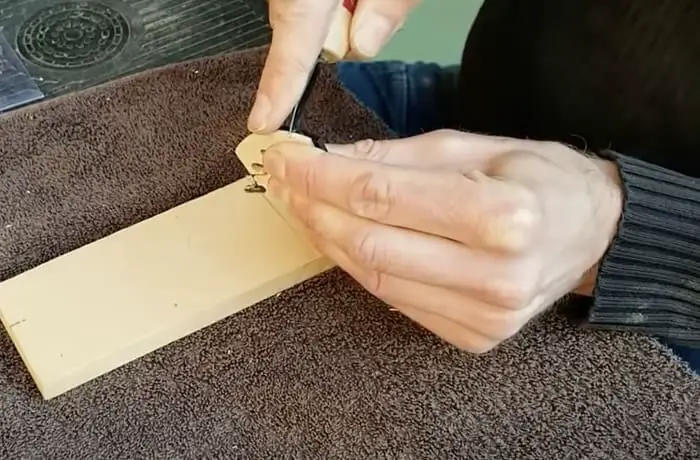
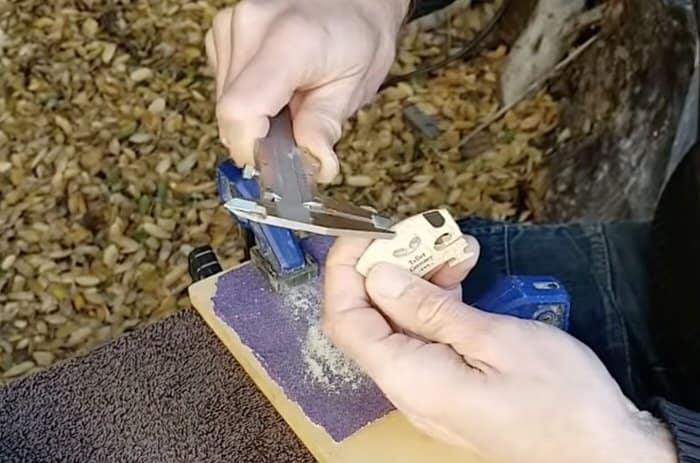
At least, you can prepare the feet of the bridge as so:
- put a piece of sandpaper (sanding side facing up) on the top of the violin where the bridge should be;
- the sandpaper naturally takes the shape of the arch. Sand the feet of the bridge there until it fits perfectly on the table.
How to place the bridge on a violin or viola
To place the bridge, put at least one string in place and keep it loose. It will help you keep the bridge in its position when in place.
In a nutshell, the bridge is in-between the tailpiece and the fingerboard. Let’s assume the bridge has been prepared already for this very violin.
Then, if you need to put the bridge it is for two reasons:
- you have received a violin by mail, and the bridge has fallen off during transport or hasn’t been put in place before transport to avoid damage; if you buy a violin without a bridge, chances are the soundpost is glued in place. These are hints of a lower-quality instrument. A glued sound post is terrible for tone.
- you have removed all four strings at once (which you shouldn’t do!), and the bridge has fallen off.
Do not shake the violin. Hold it with great care. You do not want the sound post to move or fall. If it falls off, and you don’t see it, you will break the violin table with the tremendous force of the tension of the strings without support underneath.
- Put a soft cloth under the tailpiece not to damage the varnish,
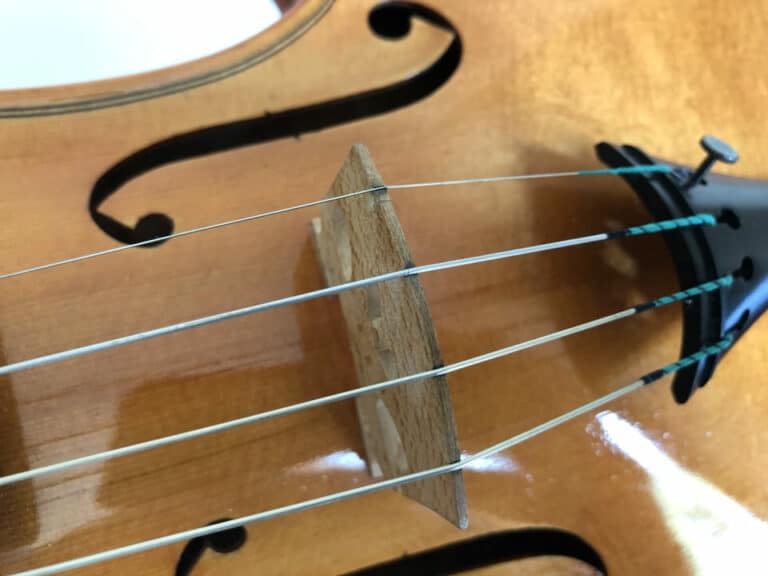
- Make sure you put the bridge in the correct direction: the bridge is not symmetrical. It is higher for the G string than it is for the E string. And it forms a triangle: the feet are flat on the table of the violin, the side of the bridge towards the tailpiece forms a 90° angle, the third side of the bridge is oblique (towards the fingerboard).
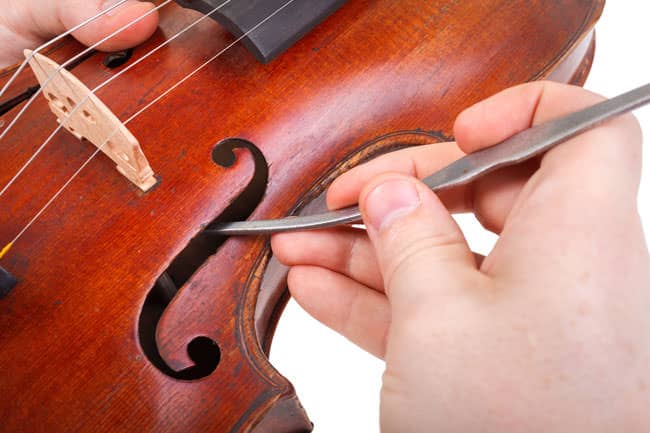
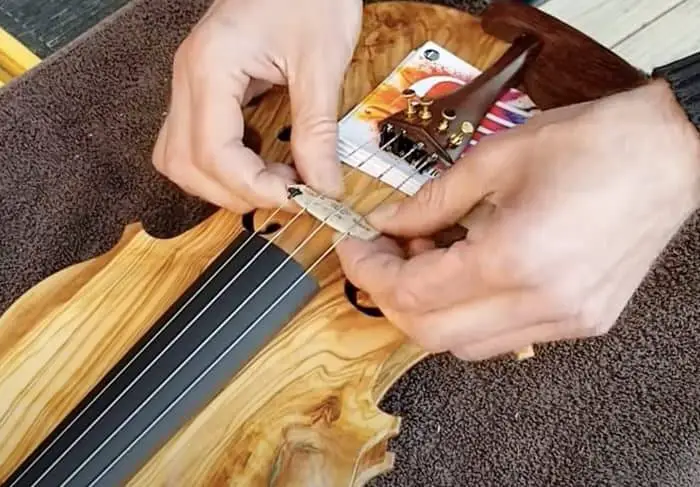
- Look at the F-Holes. There is a small notch in the F-holes that indicate the position of the bridge. Align the bridge with those marks and center it perfectly. Put at least one string on top of it to hold it in place, preferably two or more. Measure the distance between the bridge and the F-Holes on each side and make sure it is precisely the same. Tap gently on the bridge to make it slide slightly if needed.
- Make sure the bridge is straight. It shouldn’t rest at an angle with the table of the violin. I should form a 90° angle with the table on the side of the tailpiece (see picture). If the bridge leans a little bit, it has to be towards the tailpiece, as it will naturally correct its angle when pressure is applied to the strings by the bow. Plus, the bridge has a natural tendency to lean towards the fingerboard, which is something we do no want. As a matter of fact, the repeated pressure of the bow and the pegs winding the strings, in the same way, each time tend inevitably to lean the bridge on the same side. So, check often that the bridge is straight or inclining slightly towards the tailpiece.
To straighten the bridge, sit on a chair. Hold yourself straight. Put the violin between your knees. With your back straight, your violin secured between your knees, you will have great force with both hands to move the bridge firmly but delicately. In order to change position, the strings have to slide on top of the bridge: this is when the graphite you have put in the strings slots on the bridge will prove to be of great help. Read my article on how to install strings the best way on your violin: there are steps not to overlook if you want the best sound and working condition.
You should check your bridge on a regular basis. And always clean it: remove rosin dust so that it can vibrate at its best.
If you have put your bridge in place, have it checked by a luthier as soon as possible. He or she will check:
– The height of the strings
– The actual place of the bridge
– But more importantly, the position of the soundpost respectively of the bridge placement.
A violin without a bridge
If you have or have the opportunity to buy a violin without a bridge, beware. This is something a musician can’t adapt, add, or modify without the help of a professional. For all the reasons detailed above (height of the strings, arch of the table, place of the soundpost), it is a tricky matter to deal with. Unless you have in your possession the actual bridge, or it will be sold with the violin, factor in the price of a luthier’s work to put a new bridge. In any case, I would say, factor in the price of a luthier’s expertise if you buy a violin without a bridge. You can expect from $20 to $50 for a (good) bridge, plus the labor (maybe an additional $50 for one hour).