Where are Violin Strings Attached? (With Pictures)
Make sure your read further the article on the parts on the violin: a detailed blog post on the violin anatomy with pictures.
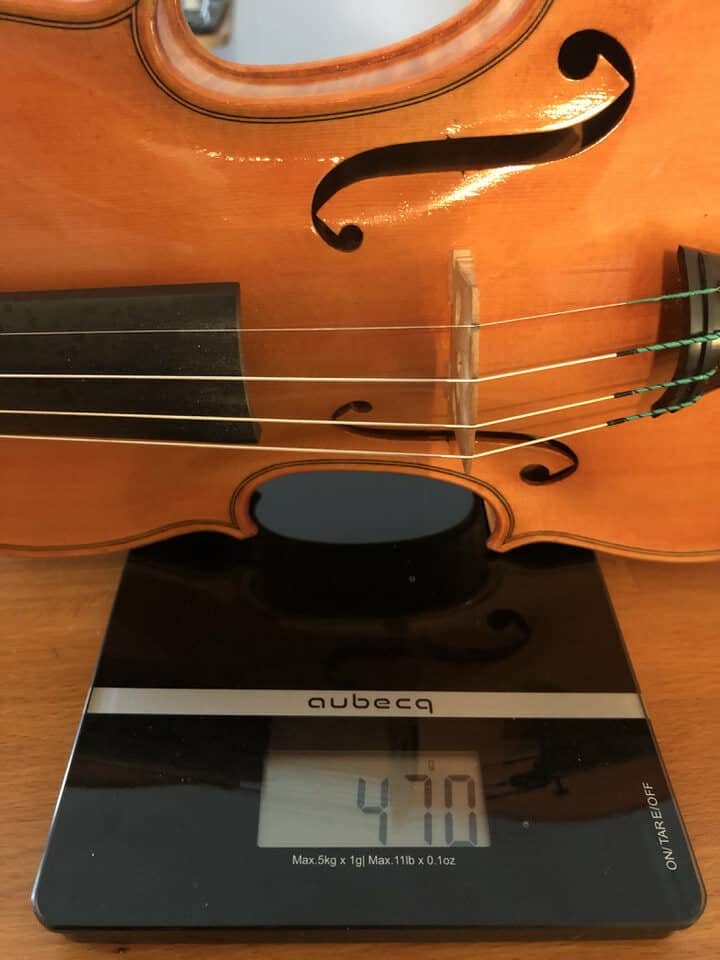
The violin is a light instrument: it only weighs 470 grams (16.5 oz). But despite its lightness, it can hold up a great deal of tension. The cumulative pressure of the strings on the instrument is 27 kg (60 pounds). This is a great deal to withstand. If we subtract the tension held horizontally by the nut and the tailpiece, the tension on the bridge is actually 3,78 kg (8,4 pound).
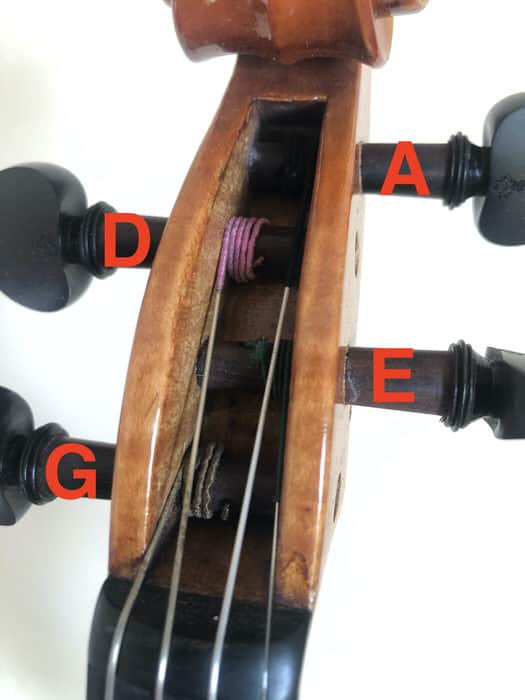
So, where are the violin strings attached? The violin strings are attached to the pegs in the pegbox. The pegbox holds the tension in the neck part of the instrument. Then, the strings go through the nut. They rest on the bridge, which transfers weight and vibrations to the table. The strings are attached to the tailpiece, which is held in place by the button with a tailcord.
The construction of the violin is, at the same time, complex and straightforward. The way strings are attached to a string instrument is essential to understand how the sound is made, how to tune the instrument, and how to change strings.
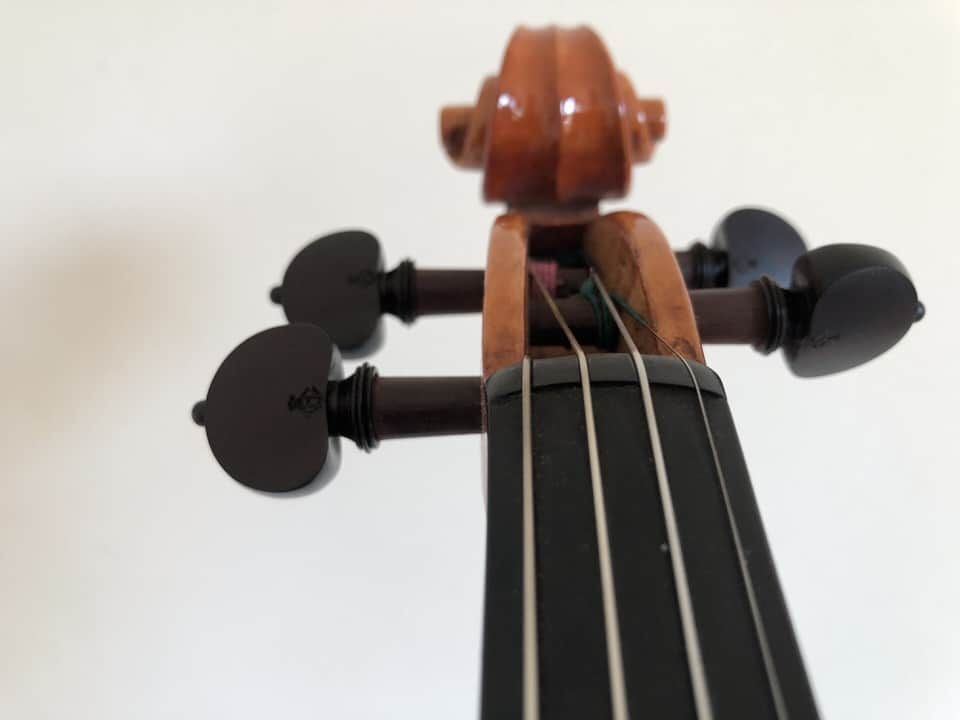
1. Violin strings are attached to pegs
The pegs serve two purposes: they hold the string tension, and they allow to change that tension. That is to say, they turn and are designed to tune the instrument.
- The G string is attached to the bottom-left peg;
- The D string is attached to the top-left peg;
- The A string is attached to the top-right peg;
- The E string is attached to the bottom-right peg;
The tension is supporting itself. I mean: the string end goes through a hole in the peg. Then the string is winded regularly on the peg (first on one side of the hole, and then on the other, in an attempt to squeeze the string end to prevent it from slipping and falling off). So the friction induced by the string’s tension is the very thing that holds it in place.
Now that the string is attached to the peg let’s see how the peg is held in place in the pegbox. Again, it is the natural friction that attaches the peg to the pegbox and prevents it from turning. The pegs are cut in a cone-like shape. When the instrument is tuned up, the pegs are turned in a screwing type motion slightly into the pegbox, which increases friction. That is why one should never go from a higher-pitched note to a lower one when tuning the instrument.
With the string winded properly over the peg, and the peg inserted into the pegbox, everything is held in place tight, and the string is attached firmly to the neck end of the instrument. Vibrations are transmitted to the instrument through that part as well, as we shouldn’t forget.
2. The nut
The strings do not go from the peg directly to the bridge: they rest on the nut.
The nut holds the strings in place. It defines:
- the correct of the string, to be able to tune the instrument and play open strings,
- the correct spacing of the strings. It is very important because on this spacing depends left-hand technique (chords, double-stops) but also right-hand technique (string crossing),
- the correct height of the string on the fingerboard to allow it to vibrate freely.
The role of the fingerboard is very important. It can’t be said that the strings are strictly attached to it, though, but the nut holds the strings in place.
The strings must slip through the nut (that is why we put graphite in the slot where strings rest). The strings mustn’t slip sideways and come off the nut (that is why the slot should be deep enough and at the correct size for each string to hold it in place firmly).
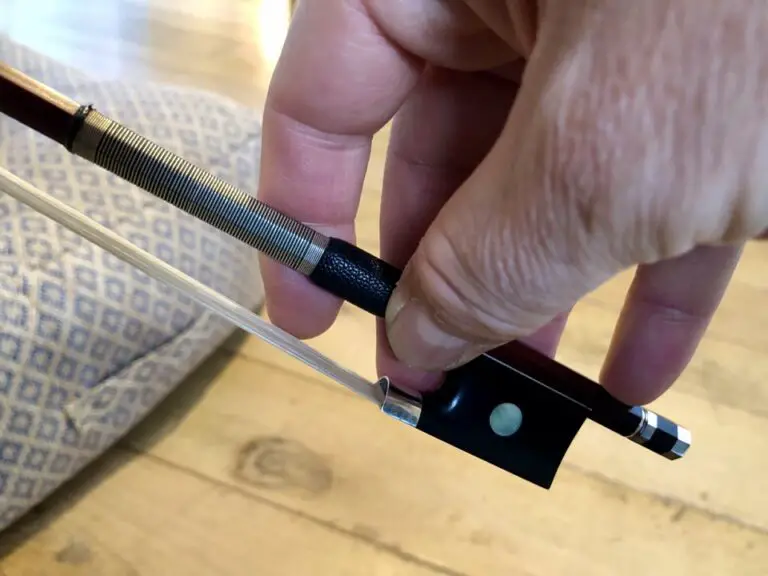
3. The bridge

As I have described, the bridge is not glued. It is firmly in place due to the downforce of the string on the table. This downforce can be measured at around 8,4 pounds (3,78 kg). The top of the violin (the table) can withstand it without breaking, thanks to the soundpost, which holds the vault of the top.
So again, it is the very tension of the strings that holds everything in place. As the tension induces friction, the bridge doesn’t slip on the table and remains firmly in place.
The top of the bridge is carved with small slots that hold the string. Like its counterpart, the nut, the bridge plays an essential role of:
- defining the correct height of the strings,
- defining the spacing of the strings,
- its curvature defines the angle of the bow when string crossing,
- holding the strings in place,
- transferring the vibration to the table and bottom of the instrument.
The bridge is a crucial part of a string instrument. A violin can’t play any sound or have any tension without a bridge.
4. The tailpiece
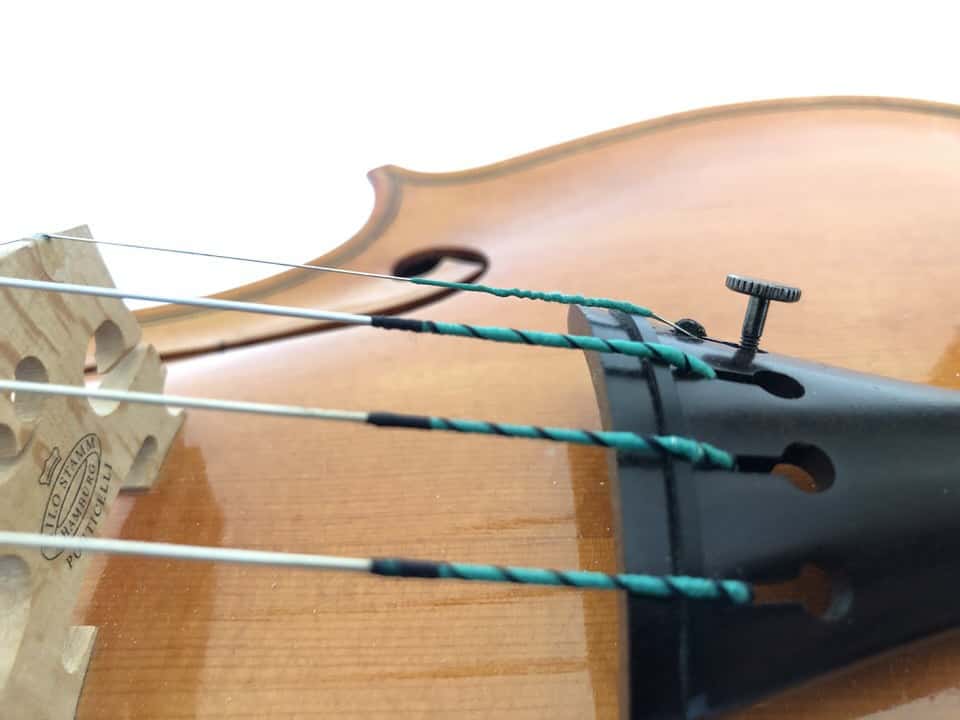
On the body side of the violin (as opposed to the neck side), the strings are attached to the tailpiece. This is a wooden piece, usually made out of ebony or rosewood (though many kinds of wood can be used to make that part as I have detailed here).
Either the strings are attached directly to the tailpiece, or it is through a fine-tuner.
The tailpiece is drilled with four holes and slots. Traditional gut strings are ended by a knot: the knot is what holds the strings attached to the tailpiece.
Nowadays, strings are most commonly ended by a ball: again, the balls are inserted by the hole, and the string is held in place by the slot. Simple and effective.
Fine-tuners are screwed through the tailpiece’s hole. The strings are then attached to the fine-tuners:
- through a loop (for the E string). The loop is simply around a small stem, protected by a tiny piece of plastic to protect it from breaking (worn out by the stem);
- through a ball for the lower strings.
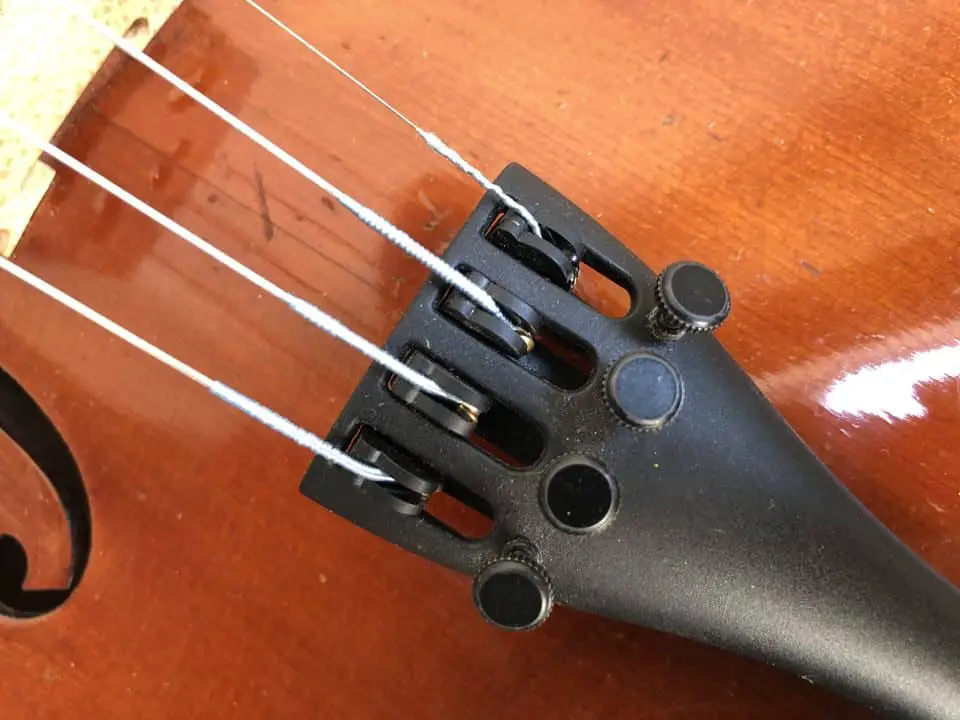
The tailpiece really serves the purpose of attaching the strings to the instrument. Its height and spacing don’t matter as much. Of course, the role of the tailpiece on sound can be debated. But its length can be mitigated with the tailcord.
5. The tailcord and button
The tailcord and the button are the last pieces that attach the violin strings in place.
The tailcord used to be made out of natural sheep gut. Now it is made out of kevlar, nylon, or composite materials. It is simply a rope that attaches the tailpiece to the button.
The button is a simple part. It is not glued as it is designed to be removed to look inside the violin. Tools can even be inserted through the buttonhole.
It is designed to be held in place firmly and sturdily. The button doesn’t just go through the ribs of the violin, which are thin. Behind is firmly glued a big wooden cleat, strong enough to hold the button, which withstands the tension of the four strings 27 kg (60 pounds). The button is made of solid wood (usually ebony).