11 Great Tips for Installing Strings on your Violin or Viola
Depending on how much you play, you need to change strings from every month to every year, but you need to do it; an old string doesn’t only lose the edge to the sound but also becomes false and you will find it harder to play in tune.
Change strings one at a time. Clean thoroughly under each string. Add graphite to improve the sliding of the string on the nut and bridge. Lubricate the peg and arrange the string winding to avoid angles in every way. Make sure that the bridge is straight. Arrange the pegs to be able to fit your fingers between them.
Changing strings can appear to be a straightforward process, but there are many important details to consider if we want to make the most out of our instrument.
1. Choose the right strings
Before taking off your first string, make sure you have bought the right set of strings. Double-check if your E string is with a loop-end or a ball-end.
Try also to keep the same type of strings. If your violin has been set up with steel strings, try to keep steel strings as well if you do it yourself. Because, if you choose to install synthetic core strings (or gut strings) the difference of tension will require new adjustments from your luthier.
So, you can change the string yourself if you keep the same type; experiment with different types of strings with the help of your violin-maker.
2. Remove one string after the other
Unlike the guitar or the electric violin, acoustic violins are held up by tension. If you remove all strings at once, it will be easier to clean the instrument. But the sudden release of tension will be bad for the instrument:
- you might not be able to put the bridge back in its original position;
- the sound post might move and even worse, fall.
By removing and replacing the strings one after the other, the violin will still be under tension and will remain in its original position and settings.
By replacing strings one after the other, you won’t mess up with strings and install the G string on the D peg, for example!
If you want to replace the strings all by yourself, the last thing you want is to go to the luthier to have your violin checked and adjusted.
Make sure not to scratch the varnish with the sharp string end when removing the old string. It happens so fast!
3. Clean your instrument: for looks and for sound
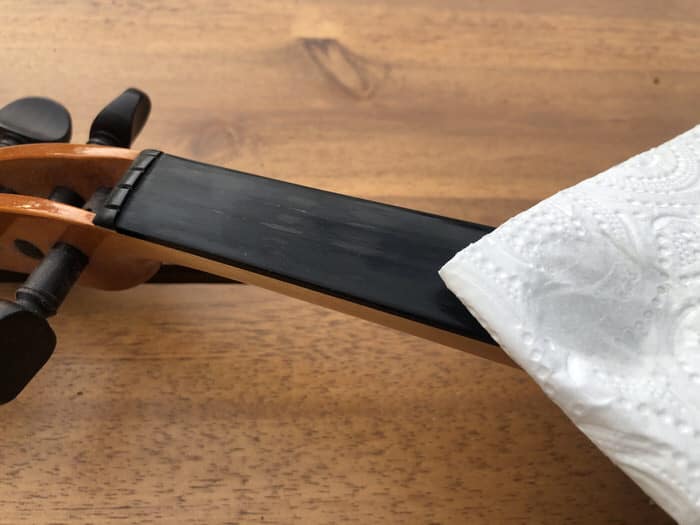
When each string is removed, take the opportunity to clean the violin thoroughly where you didn’t have access :
- the fingerboard with alcohol,
- under the strings, between the fingerboard and the bridge, with a microfiber cloth,
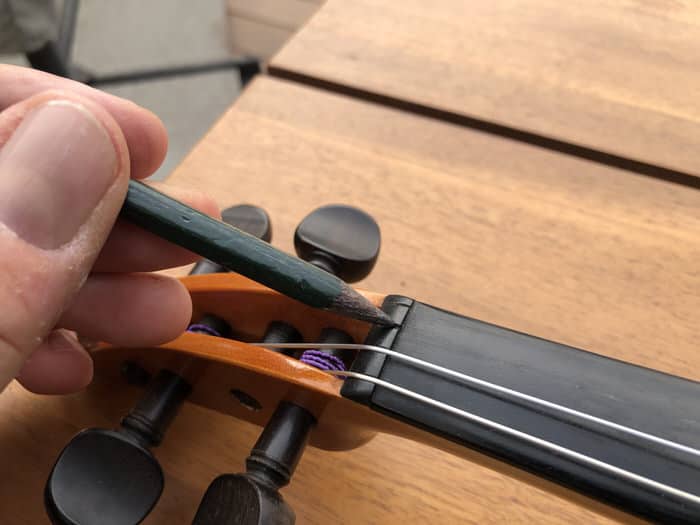
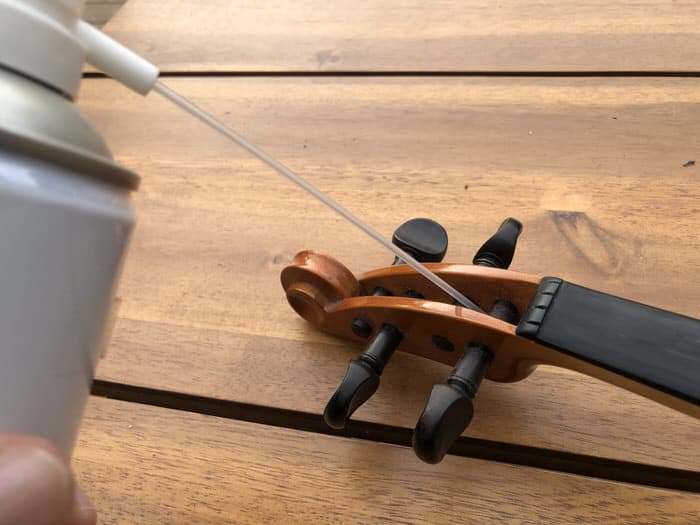
- clean the pegbox with a hard pencil to remove dust. You can use compressed air or a vacuum cleaner as well,
- clean where the string slides on the nut and on the bridge as well, with a tiny bit of alcohol.
Do this for each string, one after the other. Take this opportunity to have a perfectly clean instrument, as dust and dirt can have a bad effect on vibration. If you want to have perfect sound, then the perfect vibrations have to happen on a clean surface of the wood.
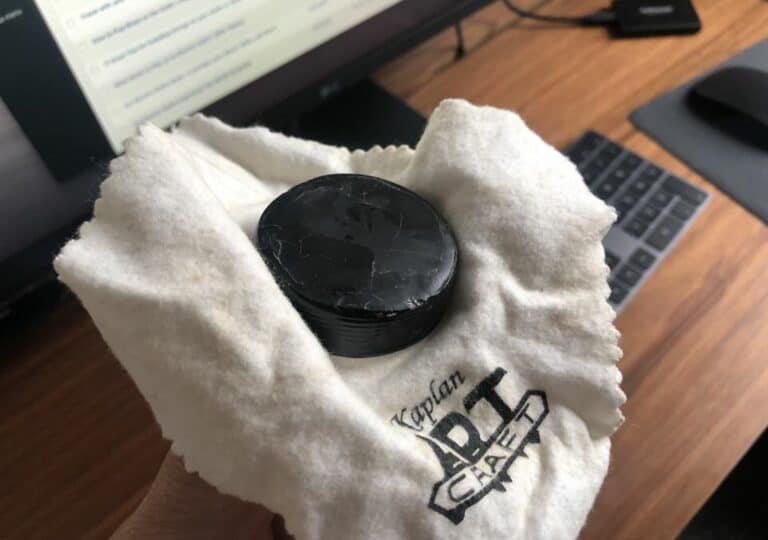
4. Lubricate the bridge and the nut
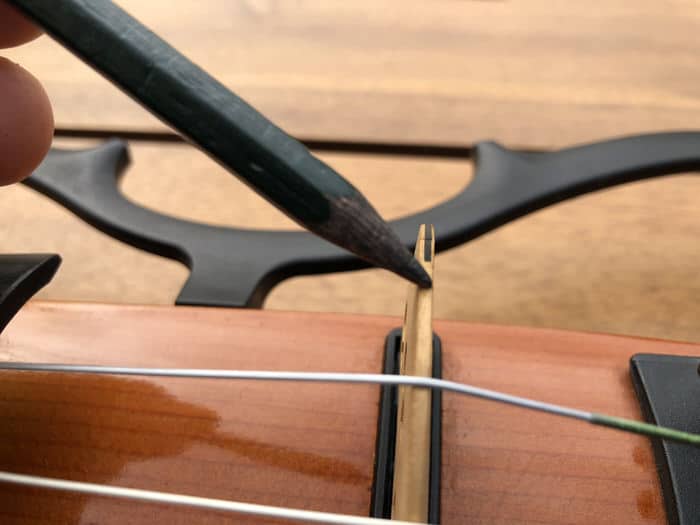
Put some graphite (pencil tip) on the place that receives the strings on the nut. It helps the string to slide and :
- removes differences of tension from one part of the nut to the other. Tuning your instrument will be smoother.
- it helps the string to slide on the bridge; if you tune your violin and the string can’t slide, it will have as a consequence to lean down the bridge day after day. Your sound will suffer from that.
These differences in tension can damage the string after some time and elongate the string differently in deferents parts. Plus, as they build up, they can be released in a sudden burst, in an unwanted moment. For example, you play a strong chord and add tension to a part of the string, this imbalance releases the tension stored in the other side of the nut. Then the string is out of tune, something you don’t want especially in that crucial part of your concert.
5. Clean the peg

The peg has to be clean, but shouldn’t slide in its location. That is why you shouldn’t clean it with anything but a dry cloth. If needed, if the peg can’t stay in place, there is a special product from Hill to help the peg stick in place while allowing it to turn without much effort. You tune up your instrument easier. This product is easy to find on Amazon now, and its price has fallen.
We used to put cray and soap, but I do not recommend this anymore is spreads dust in the pegbox.
Turn the peg inside the pegbox, in its location, as if you were screwing it slightly. Do not apply too much force.
If your peg still turns by itself and doesn’t stick, with the Hill special compound and some force, then the whole that receives the peg might be worn out. Luthiers know how to deal with that problem and add a little bit of wood to tighten the hole and hold the peg correctly. Just ask your favorite violin maker for advice.
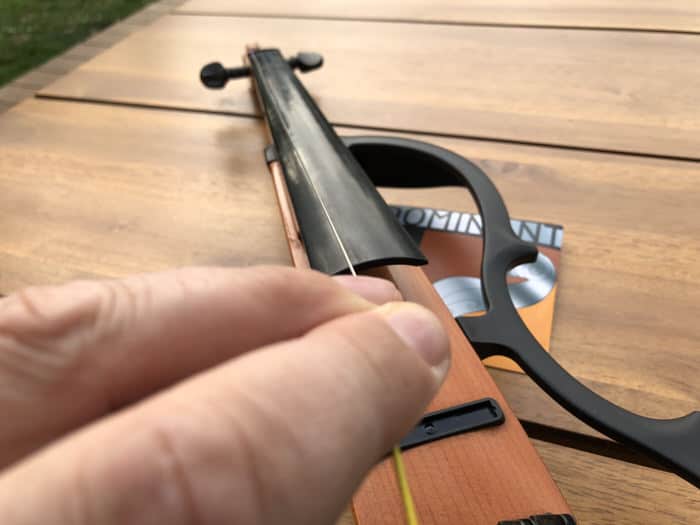
6. Clean the tailpiece and attach the string

With a pencil, clean the slot that receives the string from any dust. Then attach the new string and pull it upwards towards the pegbox.
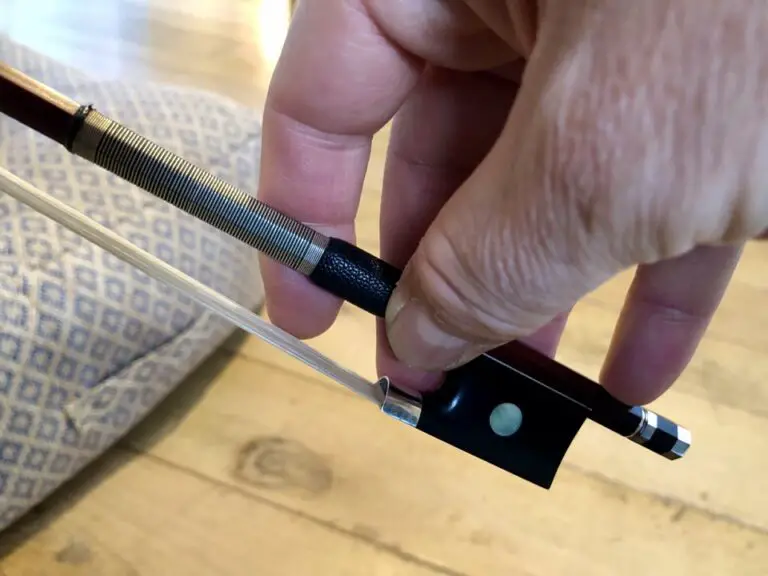
If you have fine-tuners, clean them with a pencil also, but take the screw out to lubricate it if a tiny small amount of lubricant. Do not use regular oil that will dry up and stick. After putting in some lubricant, remove the excess with a tissue before screwing it back in place.
Tighten the fine-tuner a little bit to keep room for tuning the string up in the future.
7. Pull the string
Pull firmly the string to the top of the pegbox to avoid it being turned on itself. The string needs to be straight to vibrate perfectly. If we take it out of its bag, chances are it might be slightly twisted. When being put in place, we need to make sure that it is not twisted but straight. This is a small detail that can add up and be of importance if we chase the perfect sound.
Some violinists, pull the string to stretch it when it is already attached to the peg and tailpiece. That won’t prevent it from being twisted.
My Mentor always insisted to attach it to the tailpiece first, then stretching it before threading it to the peg.
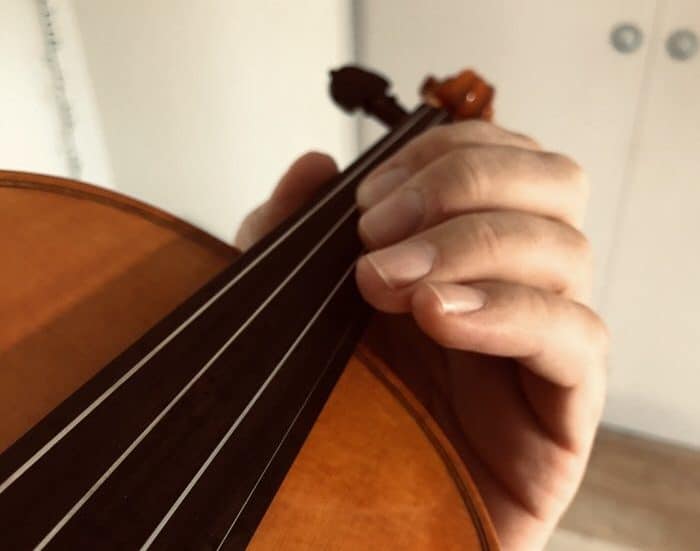
8. Insert the string in the peg the right way
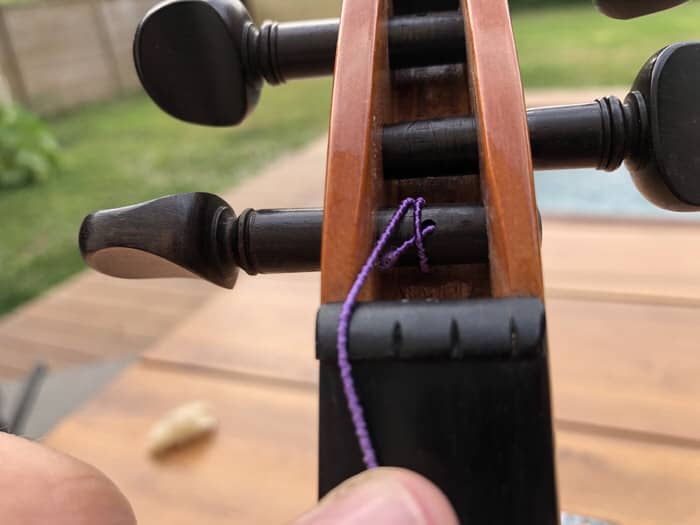
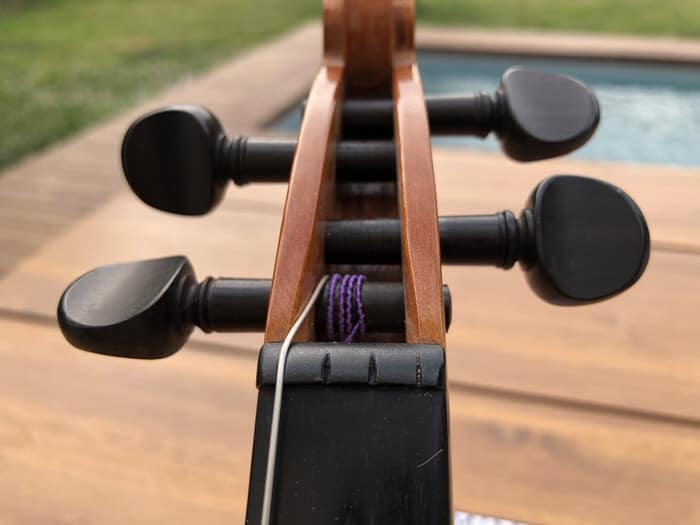
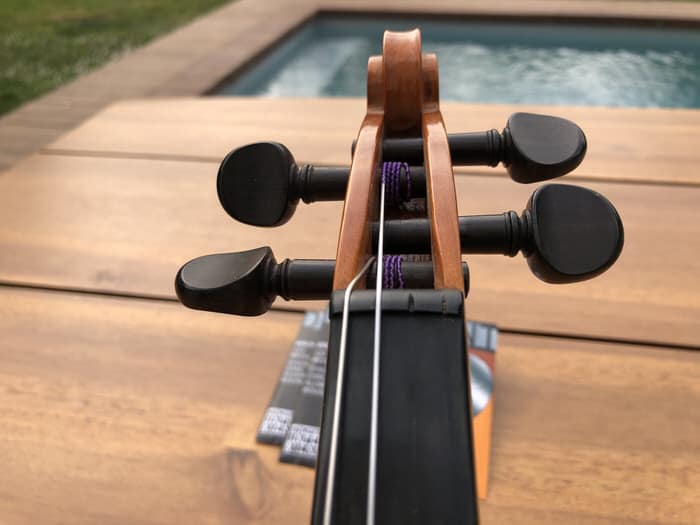
When you insert the tip of the string in its little hole through the peg, make sure that:
- you wind it on one part and the other part of the hole to help squeeze the string, and hold it in place,
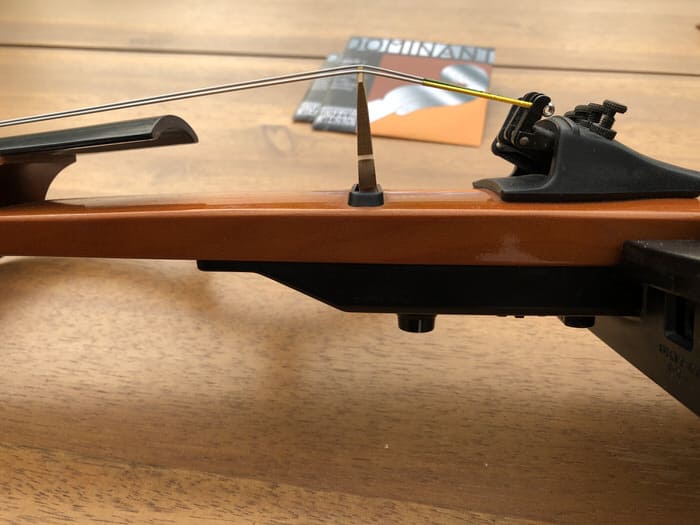
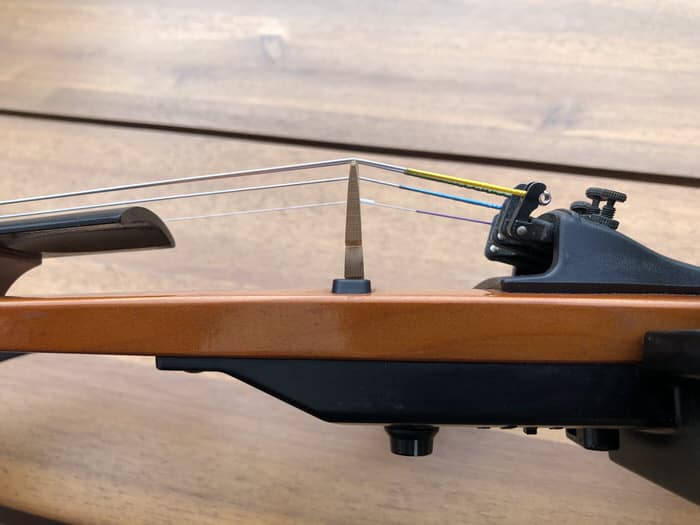
- the more winding is on the off-center part of the peg. That is to say, try to have a straighter string as possible, with no angle before the nut. The string will vibrate more freely, the sound will be better, and the string will slide more easily with the double advantage of a more stable and smoother tuning.
When you start winding up the strings, do not go too fast as the string might not be in its correct position. If you put too much tension, you might deteriorate or break something. For example, if the string is not in its place on the bridge, it might make a dent just beside its slot. A good bridge with a mark or dent between the strings is not something you want.
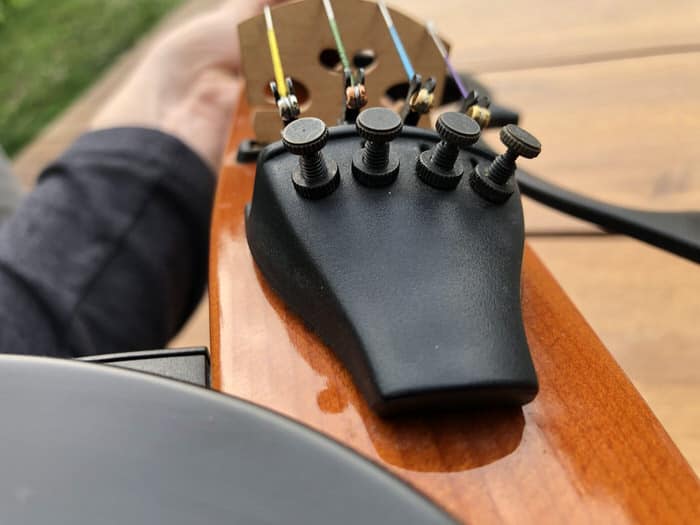
9. The pegs should be in the right position
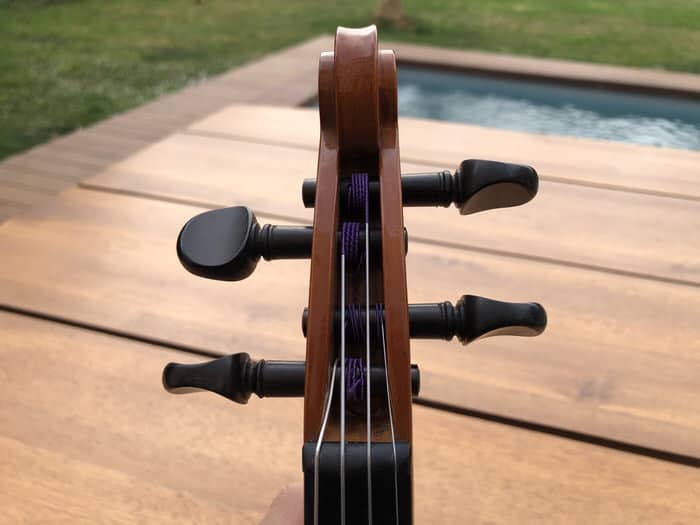
If you want to become a good violinist, you need to tune up your instrument with the left hand while playing with the bow. For that, you need to be able to slide your fingers between the pegs.
So, it is particularly important to have the pegs correctly aligned. This is not just to give your violin a professional look, even if it surely does. It is to make the tuning process easier or even possible. When the pegs are aligned correctly, you can fit your fingers between the pegs and turn them easily. If the head of the peg is flat, it will be hard to turn it without sitting down and holding your violin on the knees.
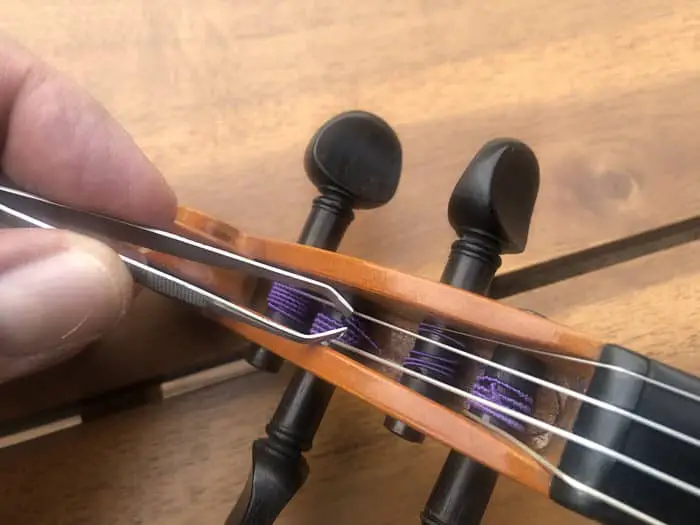
To orient and align the peg perfectly, there is no shortcut. Tighten and tune up the string and see the result. Then, if you get an unwanted position, loosen the string and pull slightly the end of the string with tweezers. Do it again until the result is good. There is no simple rule other than trial and error.
Keep in mind that the string will naturally stretch slightly in the following hours, or days, so keep a reserve in that regard. So, to be perfect, you should anticipate that stretching and the pegs shouldn’t be perfectly aligned at first when they are installed. But this is nitpicking, I must admit… But isn’t perfection for nitpickers?
10. Adjust the bridge

Laterally, the bridge shouldn’t have moved at all because you have changed the strings one after the other. The three remaining strings must have exerted enough pressure on the bridge for it to remain perfectly stable.
But 4 strings have been pulled and stretched. The risk is that the bridge is now leaning towards the fingerboard. That is not what we want. Sound-wise, it is not good, and if the bridge stays in that position for too long, it can be damaged and needs to be replaced.
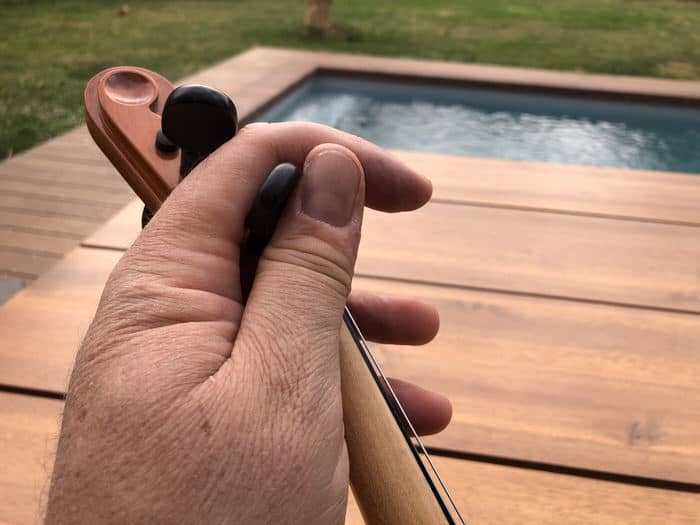
So always check your bridge and put it back in place if needed. You do not need a luthier for that if you are careful. Sit down with your back straight. Hold your violin with your knees, between your legs. Then lean your hands on the ribs and hold the top of the bridge firmly and push it slightly. Be firm be very careful. Do it until the bridge sits at a 90° angle with the table of the violin. I have done it numerous times with great success, so you shouldn’t have problems with it.
11. Strings settlement
The strings will stretch a little bit during a couple of days and you will have to tune the violin a bit more often. This is normal, especially for synthetic core strings or gut strings. The string needs time to settle. There is no recommended way you can accelerate this process by pulling the string, over-winding it, or something like that.
That is why we recommend you leave room both for the angle of the peg and in the fine-tuners for this period when you will always wind up when tuning the strings.
Additional tips:
Remove unwanted buzz sounds
If you still hear an unwanted fuzz sound when you have changed your strings (and you have properly cut the remaining bit of strings), then chances are you have unscrewed the fine-tuners too much. With no tension at all, the tiny screw vibrates in its location. Just screw it back on and adjust the tuning of the string with the peg.
Another possible cause of a buzzing sound: reason can also be the vibration of the little part of the string that protrudes from the peg; it can vibrate against the pegbox or another string. So make sure no part of the string is too long: just cut what protrudes with small cutting pliers, but not before adjusting the pegs, see below.
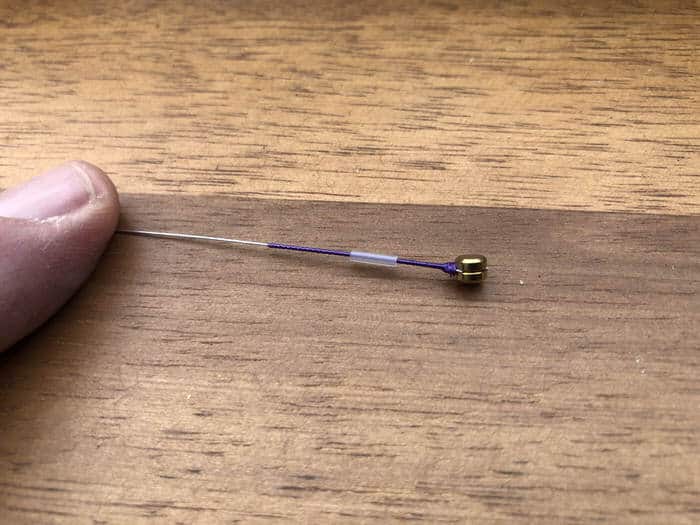
Improve your sound with a Götz fine-tuner:
To tend to a perfect sound, when you change your strings, choose a Götz fine tuner like this one, really worth the price on Amazon, because if the E string has the same length as the other strings, it will vibrate better. The length (see picture) of the string from the bridge to the tuner will be long enough for that part of the string to vibrate freely, which will give a tiny bit of more sound and richness to it.
Plus, there will be a more complete balance of sound, richness, and volume, between all the strings.
That is why he recommended loop e strings because these tuners don’t accommodate balls strings end.
When you avoid different lengths, my Mentor insisted to avoid fine-tuners at all, except for the e string. He said that it hindered the vibration of the tailpiece of the violin. The string, without fine-tuners, transmits its vibration directly and with less loss to the wood of the tailpiece.
Fine-tuners are hard to screw
If they are hard to turn, maybe you didn’t lubricate them, and/or you screw them too much without leaving enough room for future adjustments.
The string breaks when installing
Either you have winded it up to pitch too hard and too quickly, or tighten it too much. But more likely it was defective and would have broken soon enough while playing anyway. All in all, it should be considered defective from the start. Try to ask for a warranty replacement of your string.
Never install already used strings
Although it is perfectly possible to install already used strings, this is to avoid at all costs. This can ruin the sound and playability of your strings and this is especially true of gut and synthetic core strings.
To know everything about your violin and bow maintenance, check out my mega guide here.