How to Relax Playing the Violin: a Zen Guide
Holding the violin just isn’t natural or doesn’t seem natural. Or at least the way we have to twist and hold our left arm to hold the violin.
As a consequence, we tend to hold our instrument tight and get tired quickly. And sometimes, pains arrive and stay, hindering our play. Long rehearsals become painful and feared. The pleasure we usually have to play goes away. And even, musically, our sound and interpretation are not at their best. Our violin ability at best plateaus or even goes down. And then, what used to be a pleasure is a pain up to the point where some people consider quitting.
So I will give the best advice I have read or been taught, whether it was in Yvan Galamian great book or Yehudi Menuhin’s. And also, what my mentor taught me extensively about the great Russian Violin school of violin playing.
These are the words: a violin hold and a bow grip. I will describe how to forget these words and how to think differently about the violin, and how our fear of dropping the violin still has consequences in our adult career.
First, the bow shouldn’t be gripped, and your hand should just be around it. No right-hand down pressure has to be directed to the string: only the arm’s weight has to be transferred to the string through the first finger. Second, the violin itself shouldn’t be held; it has to rest on the collarbone. Third, the left hand shouldn’t squeeze the neck. The tension of the left-hand fingers should be released immediately after stopping the string.
Let’s see how to do that.
I speak from personal experience: what I did to feel relaxed with my violin
When I was around twenty, I felt I was constrained and cramped and that, as a consequence, my technique wasn’t as good as it could be. I had various problems, such as playing tenths or fast double-stops passages. My trills and vibrato were really tense. But I didn’t have pains yet, playing the violin. I was just uncomfortable in a bad way. I felt I couldn’t go further in that direction, and I was hitting a wall. I was exhausted quickly. I wanted to solve these problems, be a better violinist and, as a result, a better musician. And of course, I wanted to be at ease and feel pleasure playing again, as I used to.
So I read many authors, for instance, Yehudi Menuhin and Yvan Galamian, but also Dominique Hoppenot and Yuri Yankelevich. But it wasn’t until I met the person who became my mentor, Miroslav, a student of Leonid Kogan’s, that I really understood how to relax and think about the violin differently. That made me a better violinist, improved my technique AND I felt more at ease and started to feel good again playing the violin. But I started from scratch for a few months to prevent bad habits from sneaking in. That experience was rich; what I learned was insightful. I have distilled many of those concepts throughout this blog.
How to avoid shoulders tension: do not hold the violin
First, some history. When the modern violin was starting to be developed, say in the XVI-XVIIth centuries, there were no shoulder-rests, no chin-rests. The violin was designed to be put on the collarbone, and its thickness was corresponding to the length of the neck of the average violinist. Many violinists of the great era played without shoulder rest but with a chin-rest. There were people not as tall as violinists are today with long necks. So the tendency to use huge shoulder-rests and chin-rests has become the norm but prevents the neck, the shoulder, the arm, and even the chest from moving freely around the violin. So, we shouldn’t forget that the violin has been designed to rest on the collarbone solely.
Hold yourself and breathe. I remember the first thing my mentor told me: just how to stand. The feet apart but no more than the hips width. The chest is not too relaxed, as when we chill, but not too tight, as when a soldier walks in a military context. Just in-between. Then, be aware of your feet and weight, and now breathe slowly.
Now, do not hold the violin. Put the violin on your collarbone: it should rest there naturally. It has been designed to be put on the collarbone. Now the neck of the violin naturally goes down. Put your head on the chin-rest but do not squeeze: just let the natural weight of your head on the violin. This is important.
Put the violin on the collarbone, let the natural weight of your head rest on the chin-rest. Double-check there is no movement or tension in the left shoulder.
If you have a shoulder-rest, position it in a way that the violin is on the collarbone anyway.
If you do just that, you will see that the violin still rests at an angle: this is normal. You have to put your left hand.
How to relax fingers, pinky and left hand: do not squeeze the neck of your violin
Now, put hour hand under the neck of the violin to support it horizontally or, slightly down if any angle. The neck of the violin should rest on the V shape of your left thumb and first finger. You shouldn’t squeeze your hand by any means. The neck has to rest on the fingers passively. If your head does its proper job on the chin-rest, that light support should be enough.
We have already suppressed two different potential sources of tension. Each is very important:
- we shouldn’t squeeze the violin between the head and the elbow;
- we shouldn’t squeeze the violin neck between the thumb and the first finger.
Take some time to feel that tension-less position, where the violin just rests and is not held or squeezed. And, because the tension has a tendency to duplicate, spread, and worsen, it is imperative to see any of it and eradicate it at the slightest start.
Now, how to have relaxed left-hand fingers? If the neck is not squeezed by the thumb and first finger, then the left-hand has less tendency to squeeze the strings.
If you want to prevent further tension in the left hand, it is very important to understand how to stop the strings. You will understand that you need little downforce for that. Try and use as little energy as possible to stop the string while playing: put your finger down without touching the board, just the string. You will see, or hear, that you can play perfectly fine like that, without your finger touching the board. If you press too little, though, you will hear that the sound starts to be a bit fuzzy, airy. So, press slightly more.
You do not need to touch the fingerboard by stopping the strings: use as little energy as possible.
Appreciate that feeling: this is really relaxing. And is very useful for double-stops as well. That little downforce gives soft and flexible fingers, which, in return, allow quick and micro-adjustments that are necessary to play in tune.
Now, furthermore, how is the left-hand fingers movement? As my mentor used to say, no tension is bad in itself unless it is released immediately. So, use the natural weight of the fingers together with the elastic nature of the muscles to help the down movement. Of course, a bit of muscle force is necessary. But as soon as the finger hits the string (and not especially the fingerboard, see above), any unnecessary tension has to be released straight away.
That is the base for the left-hand technique. Now, of course, you can experiment with that and articulate with the left-hand fingers if the passage requires it musically. But acquire that habit to press as little as possible first, as a good practice. Another tip for advanced violinist: if you want to increase your left-hand articulation and its cleanliness, especially with a band while your fingers are relaxed is, when you remove your finger, you do so by a lateral movement. That slight left-hand pizzicato-like movement gives an edge to the following note while being very energy efficient and less prone to tension (horizontal vs. vertical movement). And is very satisfying to the hand as well.
So, to sum-up the left-hand technique: no squeezing the violin with the shoulder, no squeezing the neck with the fingers, no stopping hard the fingers. Feel that light and relaxed left side of your body. No tension will expand to the right side now. Let’s see how to bow the string in a relaxed manner.
How to relax arm: do not apply pressure with the bow arm on the string
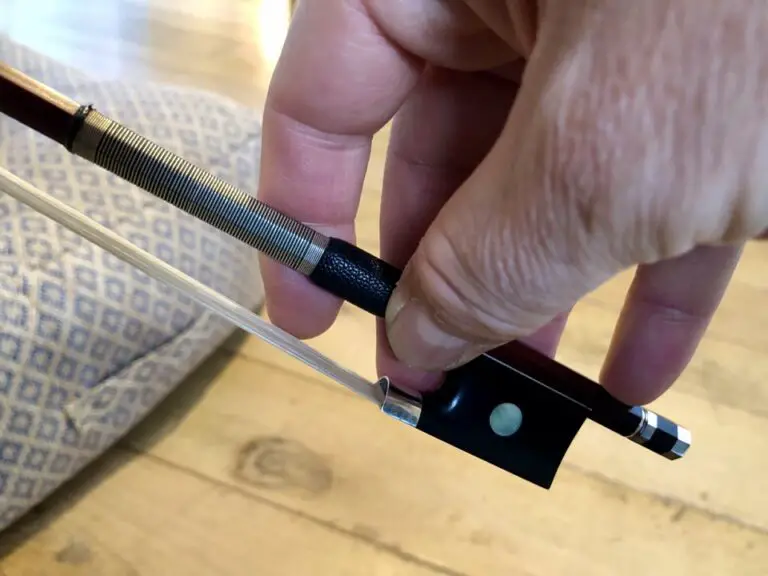
How not to grip the bow. Again, let’s forget the usual terms: we shouldn’t use the words “bow grip”. So, how to hold the bow, then? Just present your right hand as if without a bow. Put the bow inside the fingers without squeezing. Put your thumb in the adequate position:
Now, the trick is to strike the bow as if you were walking, with a natural up and down movement whose origin is gravity and velocity: no direct force. No pressure.
Do not apply down pressure. Use the speed of the bow.
If you strike the bow fast, with a relaxed right arm, you might get a surface sound. That is to say, a sound too thin, not enough into the string. So, if you want to have more contact (as opposed to more pressure), use your index more. That is to say, condense the contact of your hand to the bow through mainly the first finger (index). You will instantly recognize that the nature and tone of your sound will change for the same amount of bow speed. But without more force. So the single movement you have to make to change your sound (apart from bow stroke) is a rotational movement (pronation – supination) and NOT down pressure.
The Russian School of violin teaches that economy of movements must always prevail for a given result.
Without any grip and bow down pressure, with relaxed bow speed with a little bit of pronation for sound, you will see that you need much less energy for the same result, or even for a better one.
And less energy, less tension mean more comfort, fewer pains, and better results.
Breathe and be conscious of your body while playing, as if you were without violin
Another great tip that my mentor gave me is the role of breathing. When I played, I have noticed somehow erratic respiration, with a fast heart beat.
My exercise was to play difficult passages thinking about the phrase as a whole and NOT going through each note in my mind. The attention has to be concentrated on slow respiration instead. Learning how to breathe while playing has been a great help. Slow and regular respiration has many good consequences: slower heartbeat, less tension, less perspiration, more agility.
This is the paradox of a good technique: concentration on how to be transparent. Pressure, hold, and grip are words of willingness, and willingness has a tendency to lead to crispation.
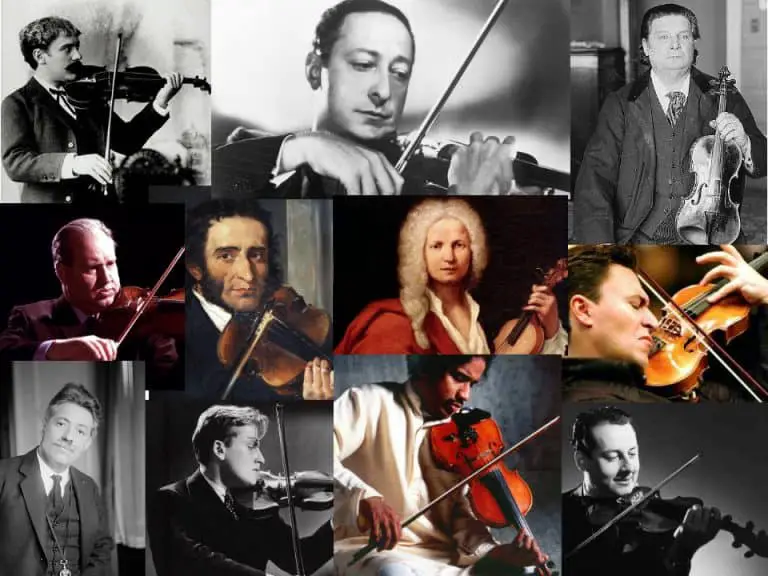
As the late great Heifetz once said: “you could play like me if you didn’t want to”. Because will has a negative effect on violin playing. This has a lot of philosophy to it. I have thought about that a lot.
In conclusion: a relaxed violin playing is possible
Many problems originate from the fact that a violin is an expensive instrument and also fragile. When we started, most of us were children. Parents and teachers told us to take great care of our instruments. And we were afraid to drop them. That uncomfortable position at first led to a tight grip. We were very tense, stiff, or contracted, holding both the bow and the violin itself. We then gained bad habits.
I have tried to explain how that is all wrong and how natural playing the violin can be, as it is researched by many great teachers all around the world. So I gave practical tips on how NOT to grip the bow and NOT to hold the violin, but get the natural help of our own weight and accompany gravity rather than apply pressure.
Of course, this is easier said than done; but I started the violin again that way with great success. I now enjoy happiness while playing with no pain. I can play longer with less fatigue because it requires less energy and mental drain.
Remember that a small crispation has bigger consequences; a tense left-hand finger can lead to a high and tense left elbow, which in return with the rule of symmetry, can lead to a tense right elbow and bad bowing and bad sound.
So, being aware of small tensions greatly impacts both technique and musicality, happiness, and energy.
The violin is a strange instrument: the less we fight it, the more it gives. The more we apply force, the less it gives back and even bottles up.
I wish you all the success you deserve in that quest and remember that it can be done.
